

-

・…━… 目次 …━…・‥
Narrow Gauge Shop in Japan, with a passion for handmade products!!
Hello, this is Narrow Gauge Shop. My brother and I have spent countless hours refining our skills to make precise and practical turnouts. Over the years, we have sold hundreds of handlaid turnouts in Japan.
In this article, we will guide you through the process of making small-radius turnouts for On30 scale.
By reading this article carefully, you will also learn how to make compact turnouts for N gauge and HO gauge on your mini layout. Moreover, these techniques can be applied to hard-to-find scales like HOf (6.5mm (0.256")) and On2 (13.0mm (0.512")).
Due to the article's length, we have divided it into two parts: this one, focused on "Rail Making", and the second part, which covers the "Soldering" process. We encourage you to check out both parts, and you can use the table of contents to jump to specific sections that interest you the most.
Without further ado, let's get started.
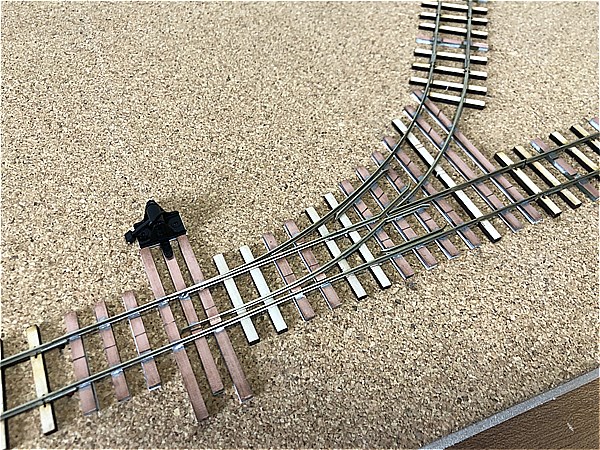
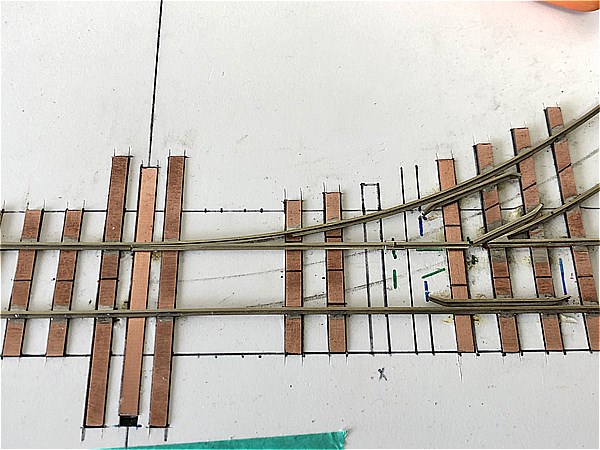
Original Self-made turnout
- OO-9/HOe (9.0mm (0.354")) Turnout R140 (Code 80) → PECO OO-9/HOe Narrow Gauge Track (SL-400) Code 80
- On30 (16.5mm (0.65")) Turnout R250 (Code 70) → Micro Engineering Code 70 Non-Weathered Rail
- HOf/Nn (6.5mm (0.256")) Turnout R100 (Code 55) → Micro Engineering Code 55 Non-Weathered Rail
OO-9/HOe (9.0mm (0.354")) Turnouts can be connected to PECO OO-9/HOe rails using PECO metal (insulated) joiners (SL-310/311).
The electrical configuration adheres entirely to PECO Electro Frog method.
We have made and sold over 350 layout baseboards. Some of them are available on Youtube and Pinterest, so please check them out!!
Youtube:https://www.youtube.com/c/narrowgaugeshop
Pinterest:https://www.pinterest.jp/narrowgaugeshop
Materials and tools used

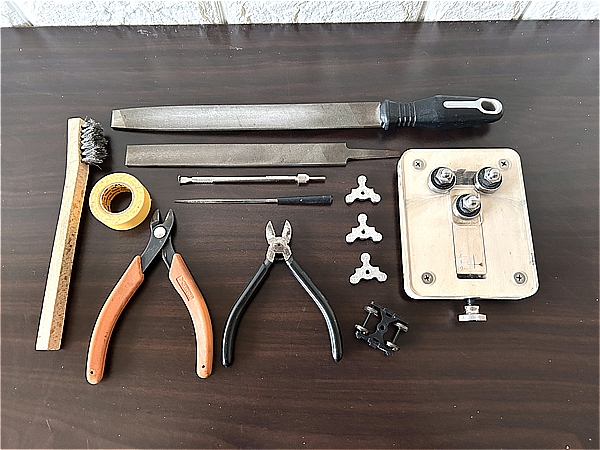
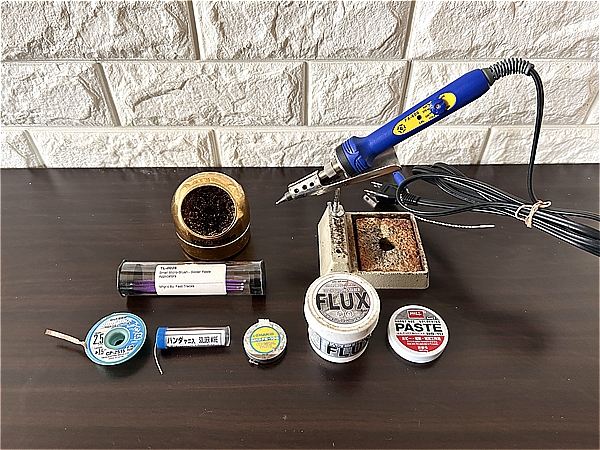
First, let me introduce the materials and tools necessary for making turnouts. The choice of materials and tools is crucial as they greatly influence the working time, precision, and final outcome!
- Tracks:Micro Engineering Code 70 Non-Weathered Rail
- Ties:FastTracks O Scale Narrow Gauge PC Board Turnout Ties - 1/16"
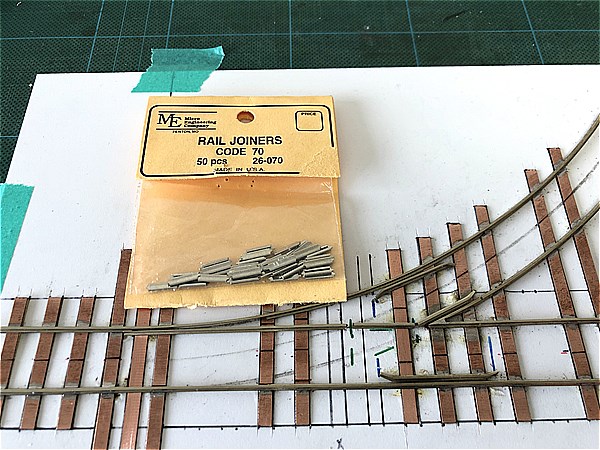
- Joiners:Micro Engineering Rail Joiners Code 70
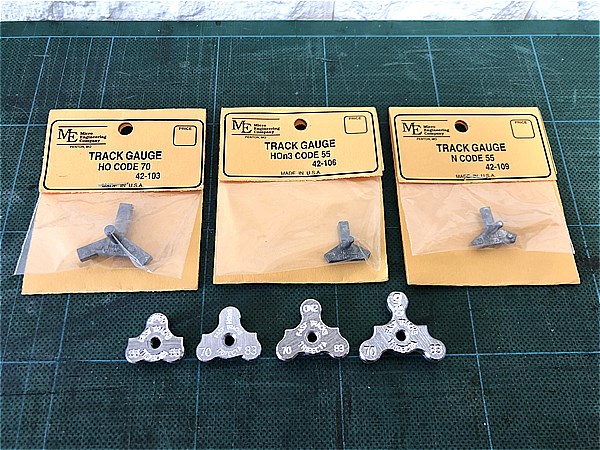
- Track Gauges:"Trifecta 3 Point Track Gauge On30 Code 70/83" or "Micro Engineering 3 Point Track Gauge - HO Scale, Code 70"
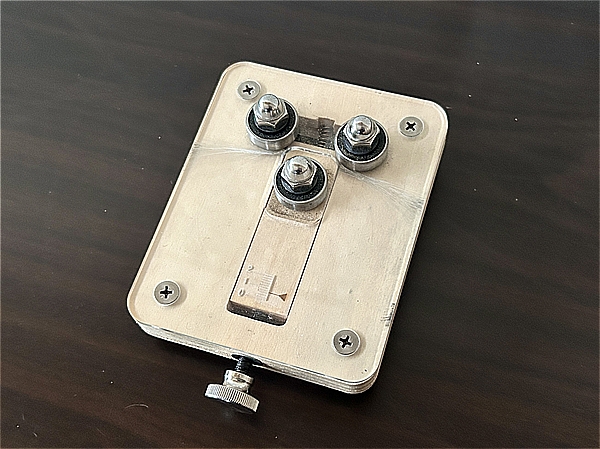
- Tracks Rail Roller (Narrow Gauge Shop)
- Bogie/Truck (16.5mm (0.65"))
- Fast Tracks Own 10" Mill File for Track Building - With Handle
- XURON Track Cutters, For HO 00 N and Z Gauge Rails
- PC Board Gap Cutting Triangle File
- File Cleaning Brush
- Wire Brush for Cleaning Finished Trackwork
- Nipper
- Masking Tape
- Soldering iron
- Solder
- Solder Flux
- Solder Paste Applicators
- Chemical Paste
- Desoldering Braid
Rails are your choice
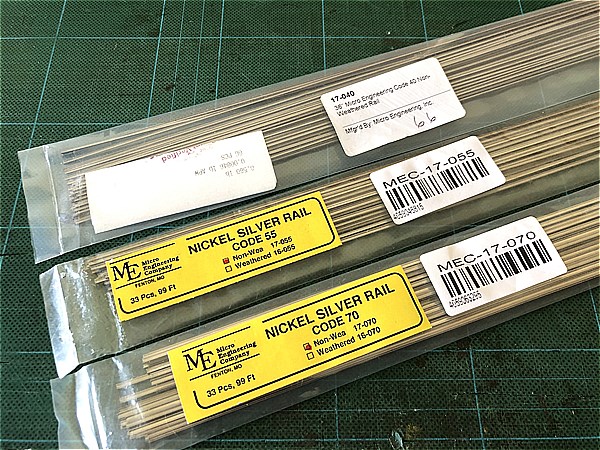
We have chosen ME Code 70 rail because it is for On30, but the process of making it for any scale or rail is the same; Flexible Track can also be used off the sleepers.
3 essentials
- Rail Roller
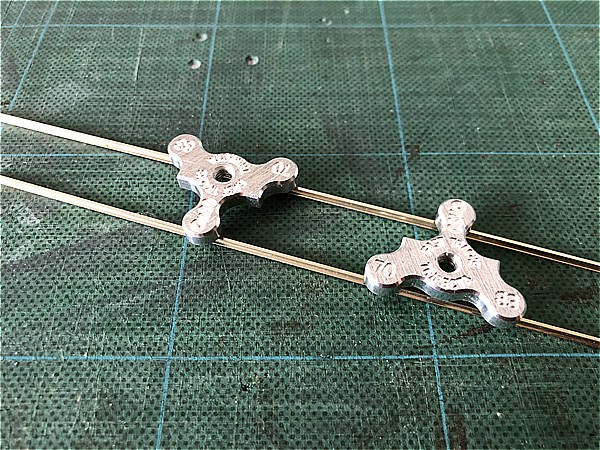
- Track Gauge
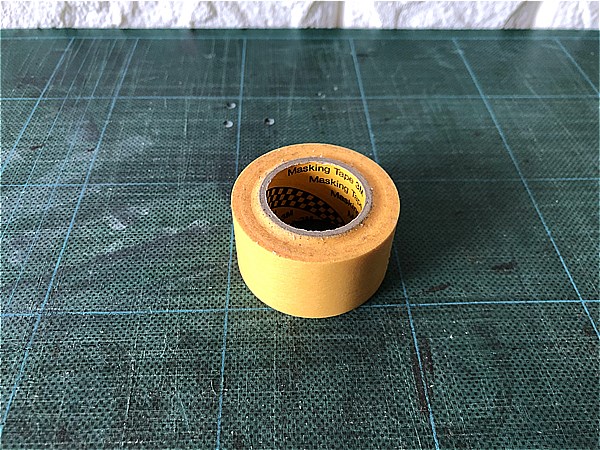
- Masking Tape
While all tools are important, I'd like to highlight 3 essential items that I highly recommend.
Firstly, for large radius turnout, a Rail Roller might not be essential. However, when creating turnouts with small radii that are not available commercially, the Rail Roller is indispensable for the making process.
As for the Track Gauge, if you make a highly accurate one, you can consider making one yourself. However, I recommend using commercially available options like the ME Track Gauge for better precision.
Masking Tape is also a must-have as it proves very useful for temporarily securing the rails. You will notice it appearing in many of the following images, underlining its importance in the construction process.
How to make Turnout [Rail construction]

Our making procedure is as follows.
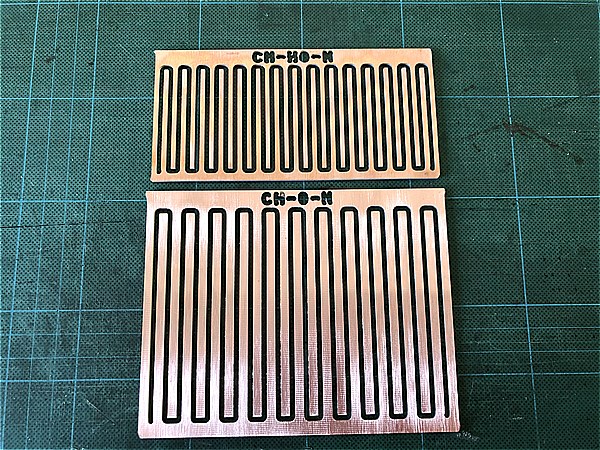
- Template (Jig)
- Stock Rail (Running Rail)
- Frog + Frog Rail (Running Rail)
- Switch Point Rail (Tongue Rail) + Closure Rail + Wing Rail
- Guard Rail (Check Rail)
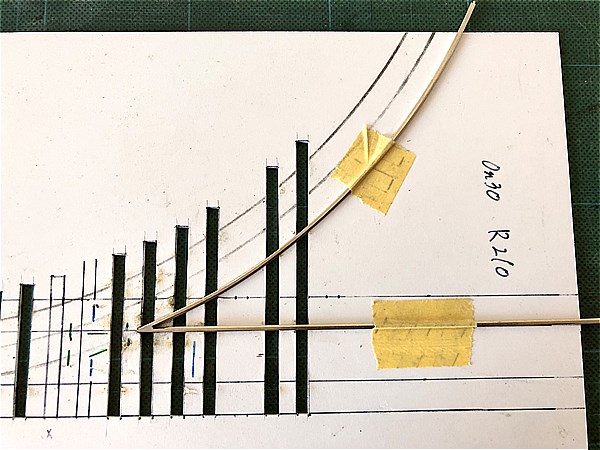
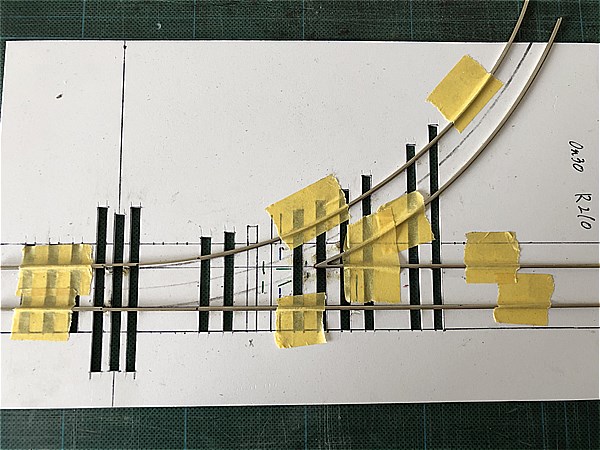
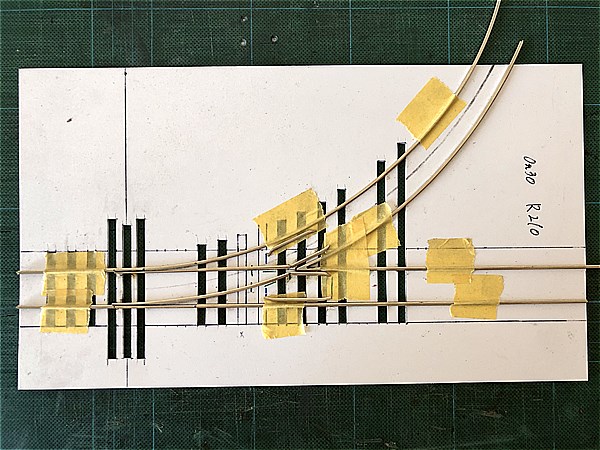
1.Making the Template (Jig)
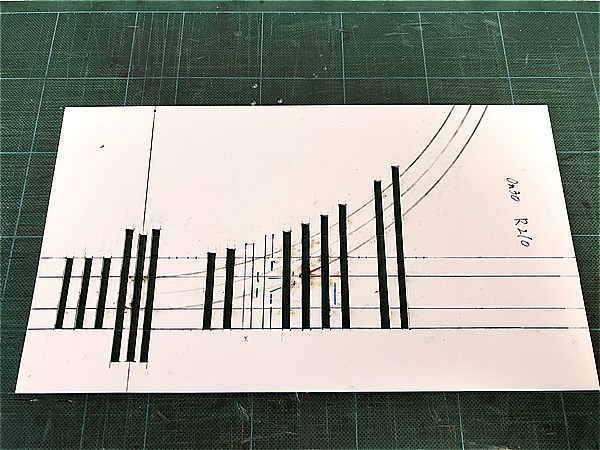
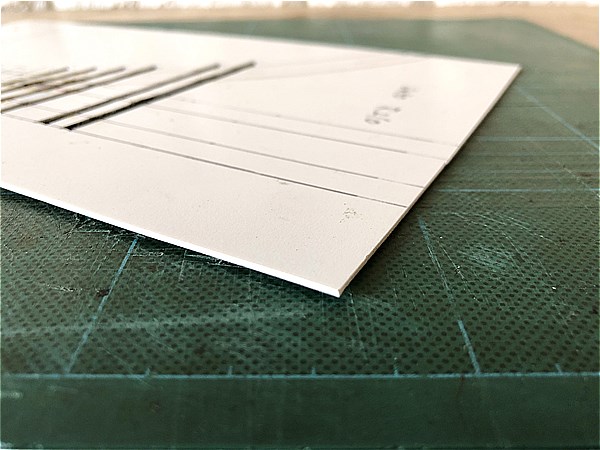

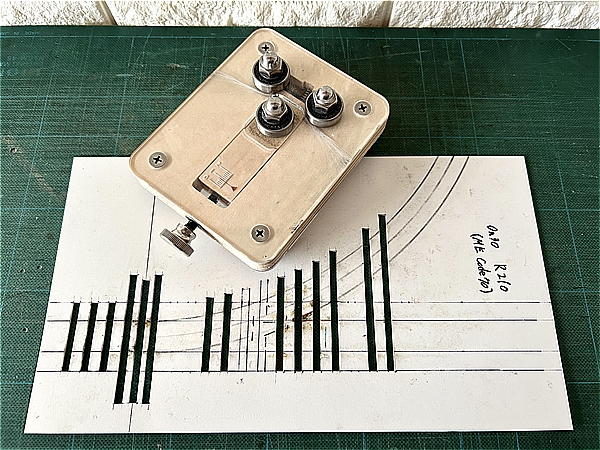
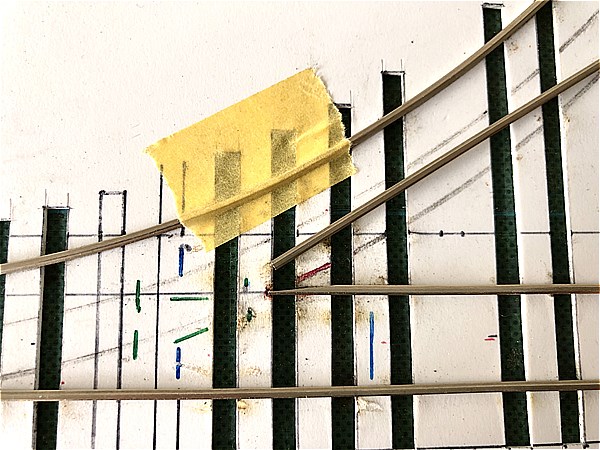
First, prepare the template (jig). Cut it to the radius of the curve of the turnout you want to make.
The template can be made from construction paper, but I use a 1.0mm (0.039") thick "Low foam PVC Board". It is recommended to use "Low foam PVC Board" as it is easy to cut out and heat resistant.
After drafting, cut out the position where the PC Board Ties will fit. The position and number of PC Board Ties does not have to be as shown in the image.
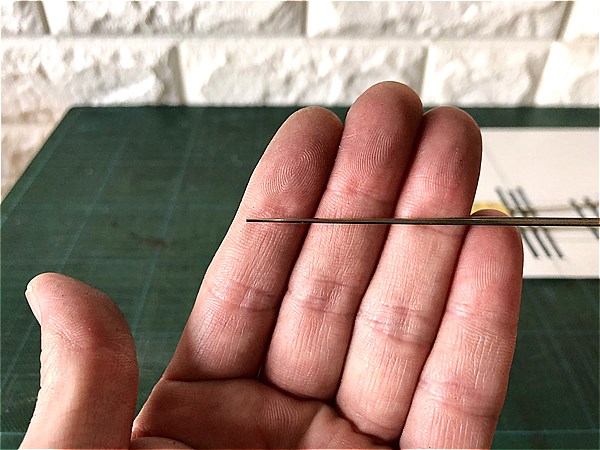
2.Making the Stock Rail (Running Rail)
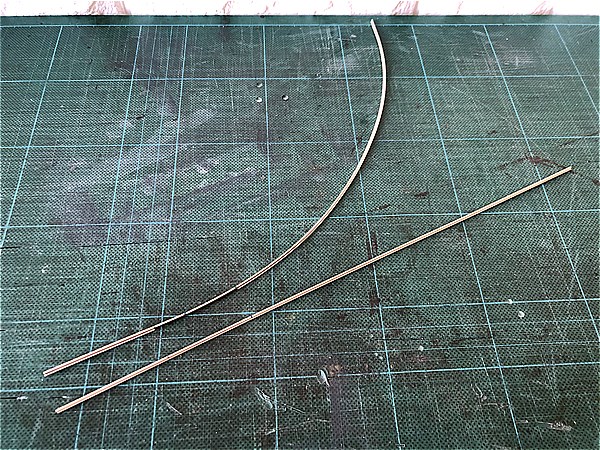
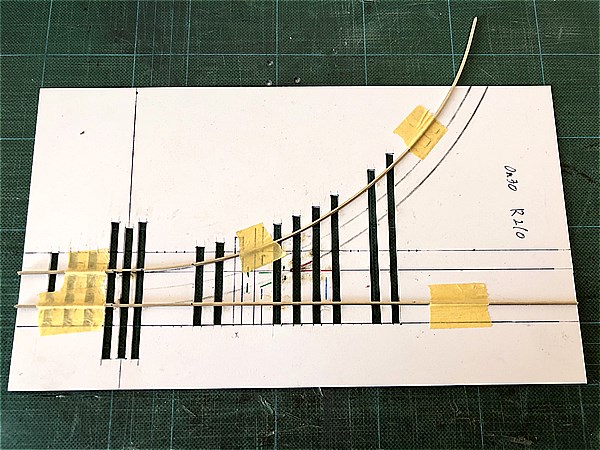
Make Stock Rail (Running Rail) for Main Line and Branch Line.
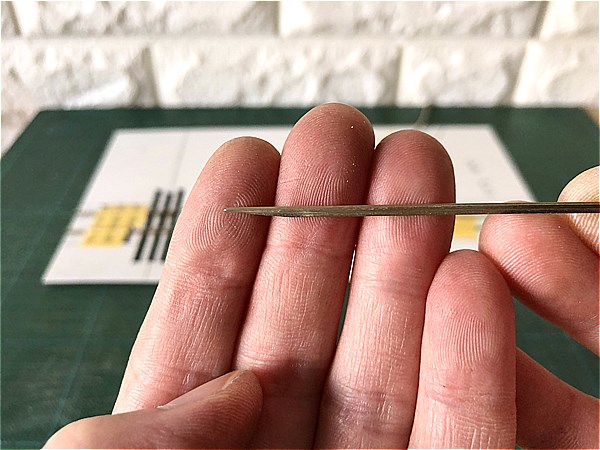
Filing and forming Stock Rail
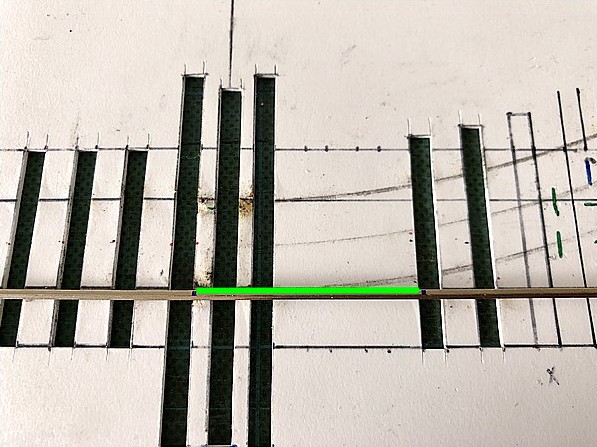
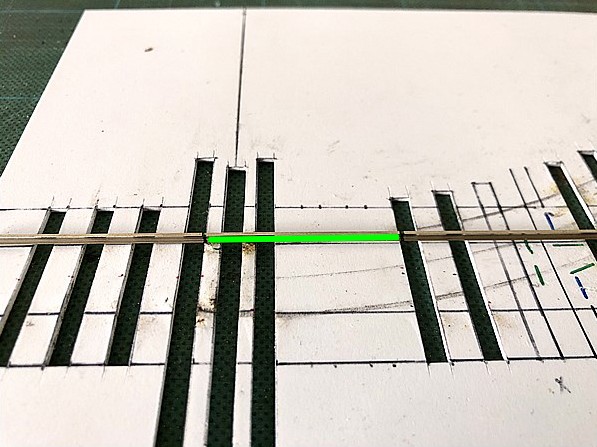
Next, make the stock rail.
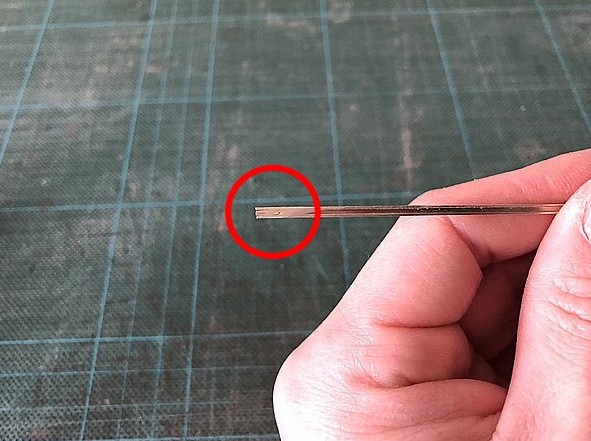
File the bottom of the rail so that the section marked in green is in close contact with the Switch Point Rail.
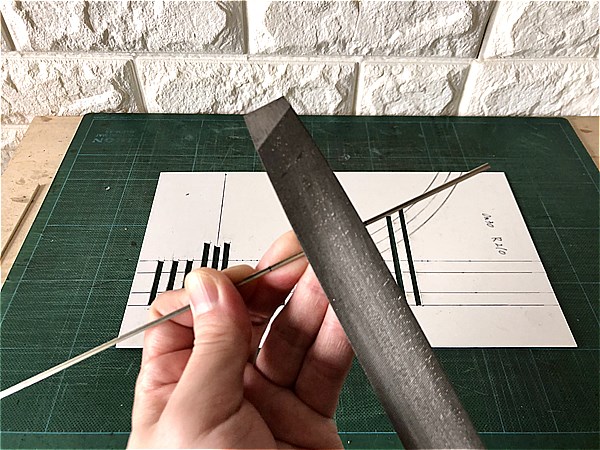
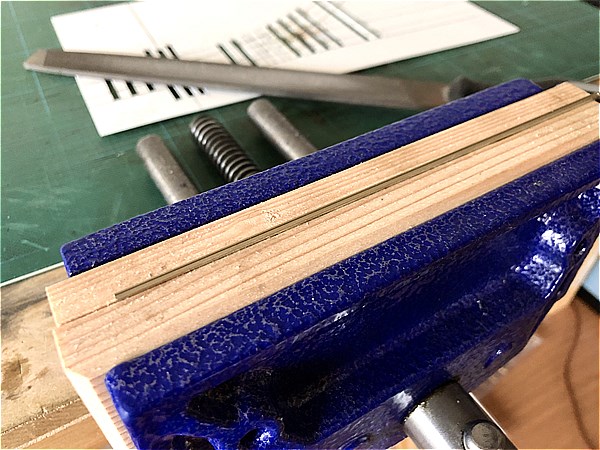
Fixing firmly with Vise will increase efficiency and accuracy. File patiently and carefully.
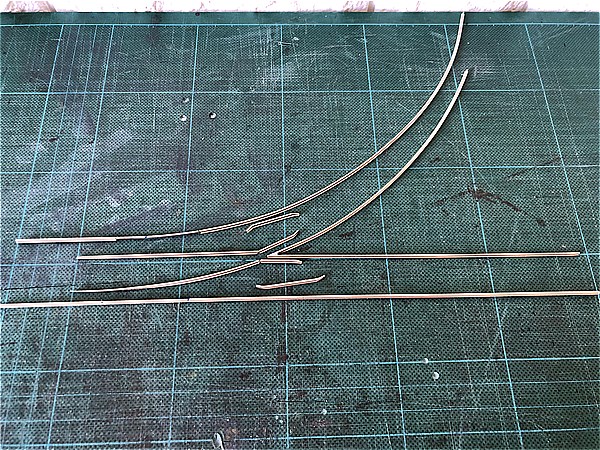
Bending the rail on the Branch Line
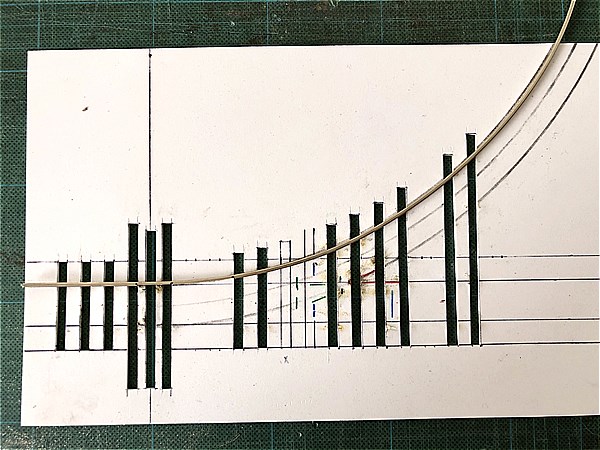
Bend the rails to match the draft.
The rails will be soldered to the PC board sleepers with minor adjustments later, so you don't need to be so nervous at the moment.
"Stock Rail (Running Rail)" was completed.
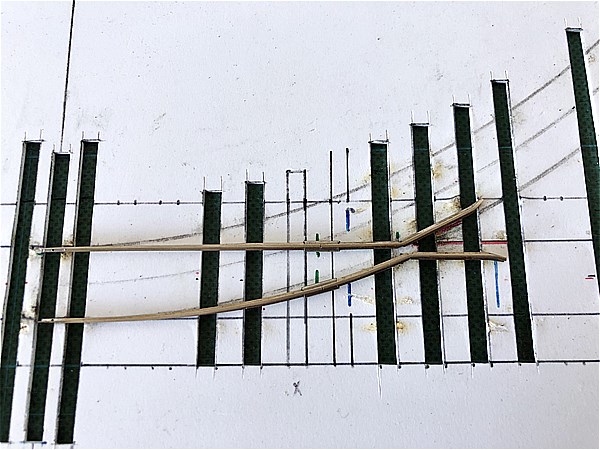
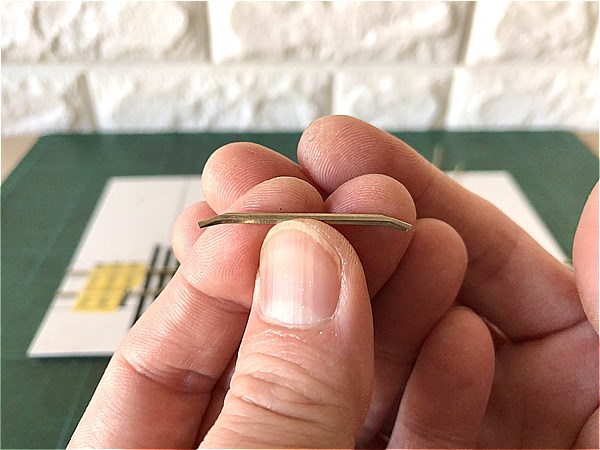
3.Making the Frog + Frog Rail (Running Rail)
Make the Frog + Frog Rail (Running Rail) for the Main Line and Branch Line.
These parts are soldered to the Frog section after the each rail has been made.
Main Line (Straight)
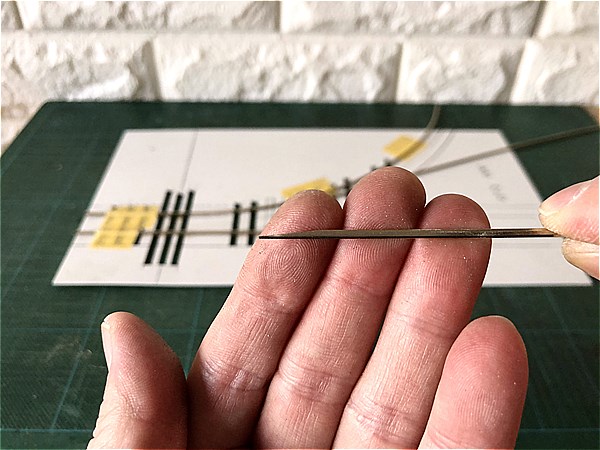
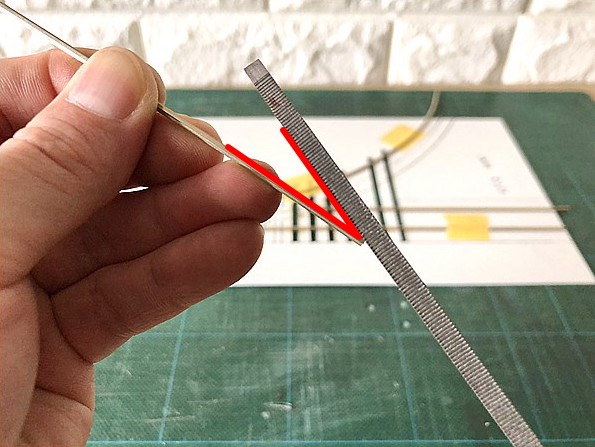
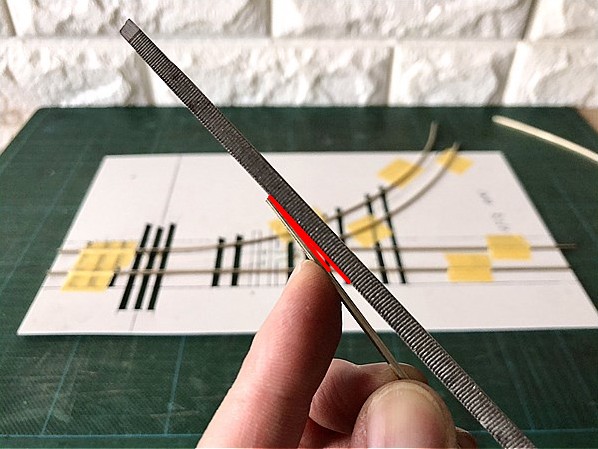
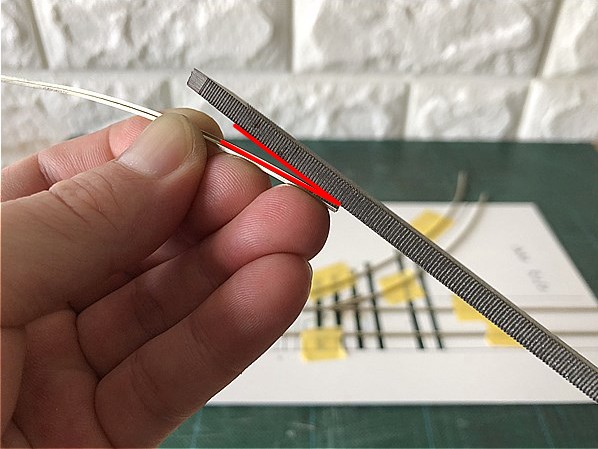
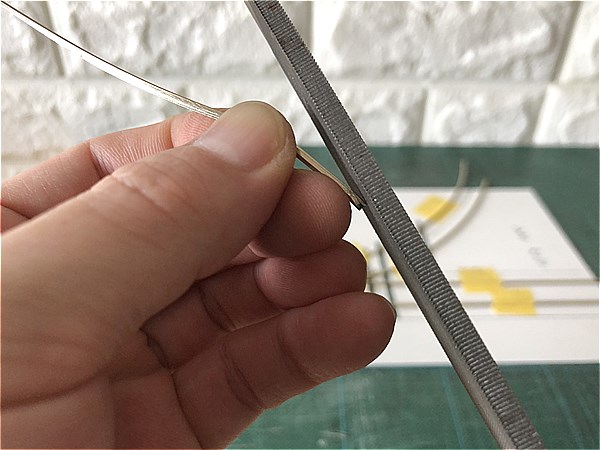
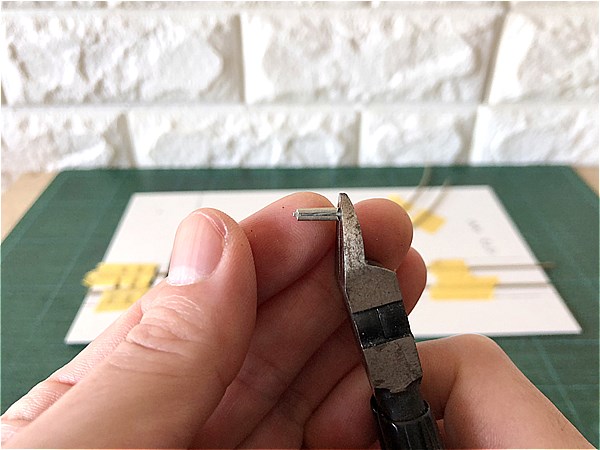
Start with the Main Line. The trick is to "file at a sharp angle".
The tip of the rail should be thin and sharp, but do not try to finish the rail all at once.
Be careful not to file too much!
The thinner and sharper you make the Frog, the more precise you can make it, but if you overdo it, the tip will break.
"Do not do it all at once, but do it little by little while checking". Remember to do this.
The same applies to the Switch Point Rail.
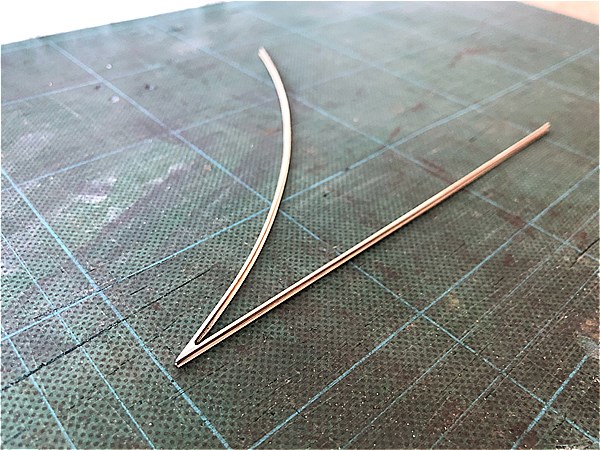
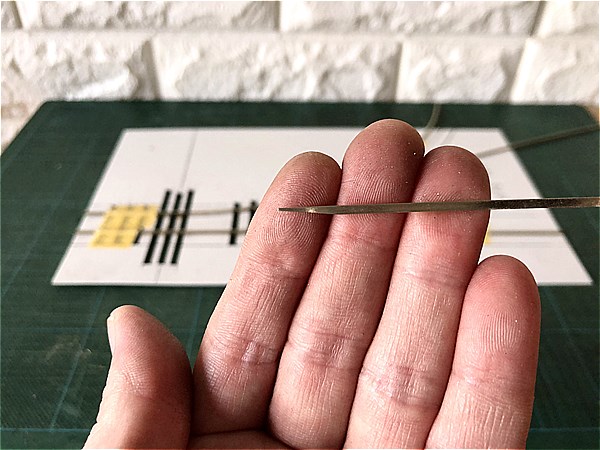
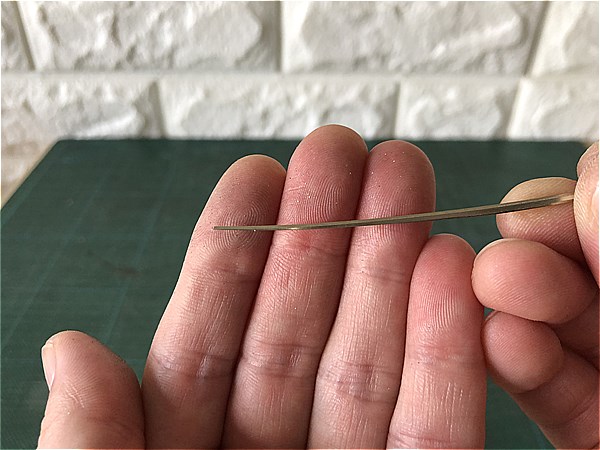
Branch Line (Curve)
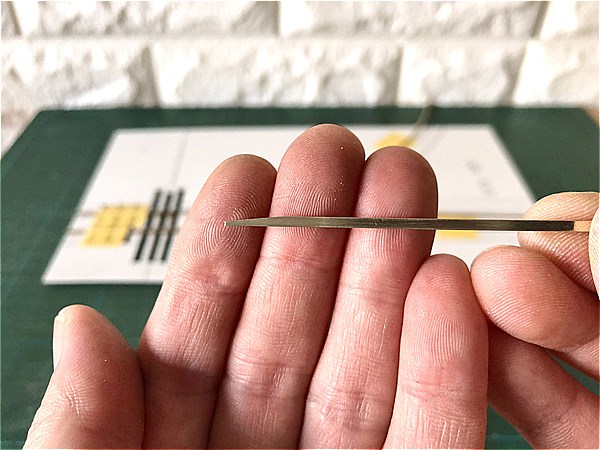
Next, work on the Branch Line.
The Branch Line is filed at a greater angle than the Main Line.
Finish it little by little while checking the "alignment" with the Main Line, which is temporarily fixed to the jig.

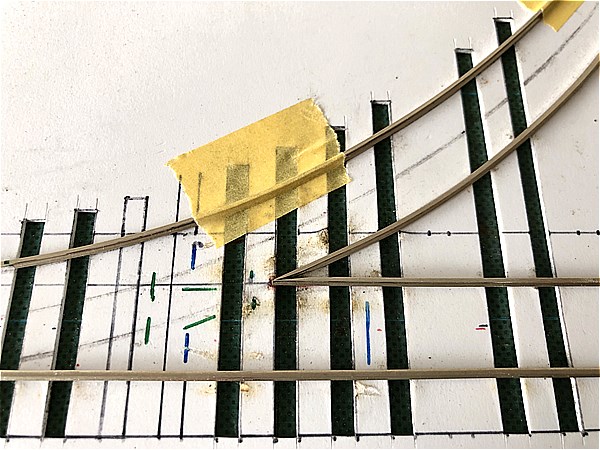
In the example, the Branch Line is a 210.0mm (8.268") radius curve, so it is bent with a rail roller after filing.
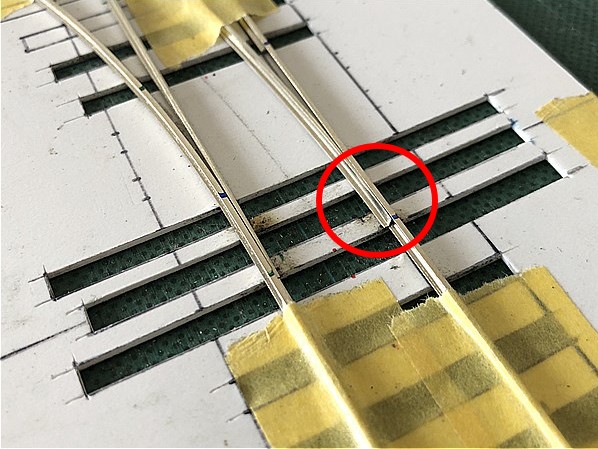
Solder to make Frog
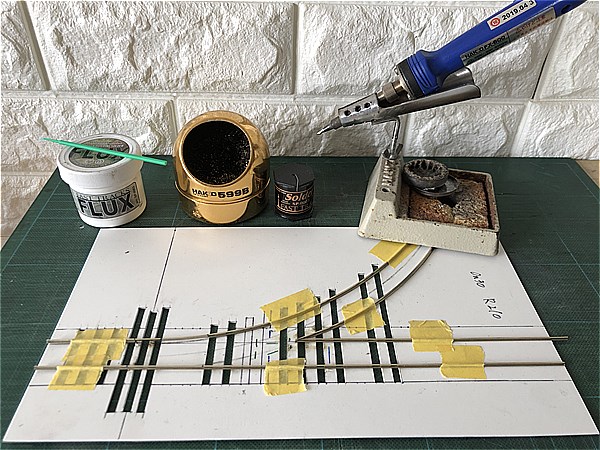
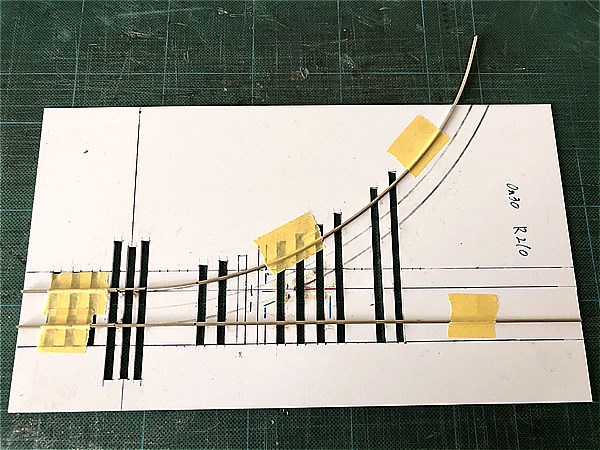
Before soldering, secure the rails to the jig with masking tape.
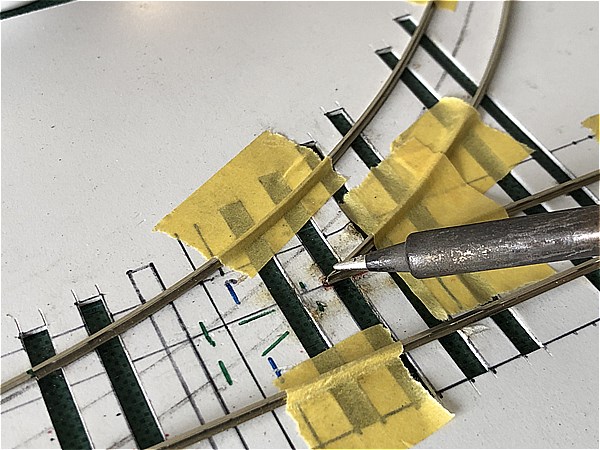
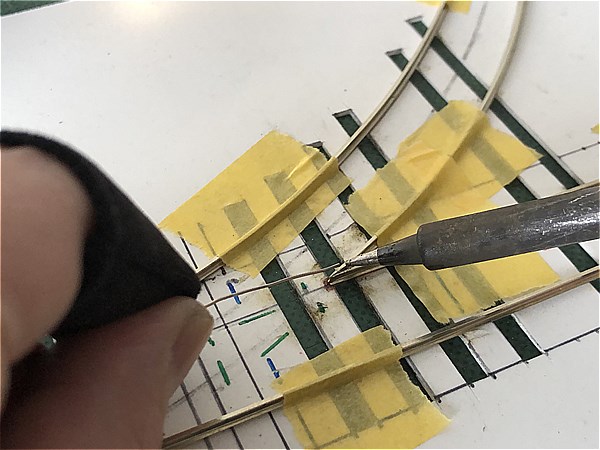
Steps to follow.
- Heating the soldering area.
- Applying flux.
- Pouring the solder.
- Shape the solder.
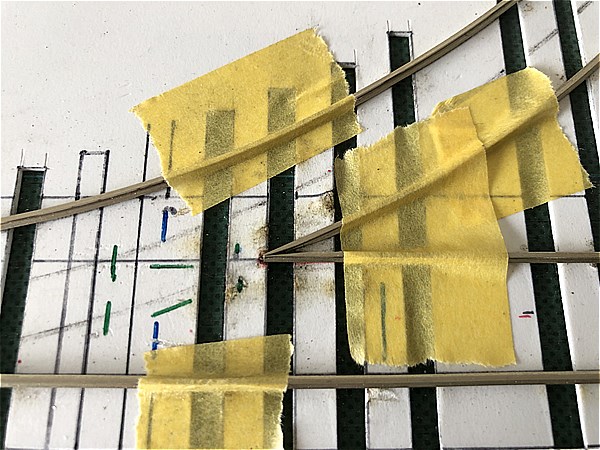
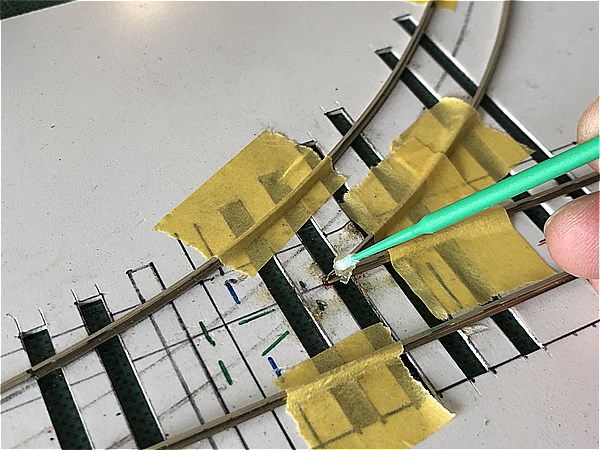
Tips for making beautiful Frog!
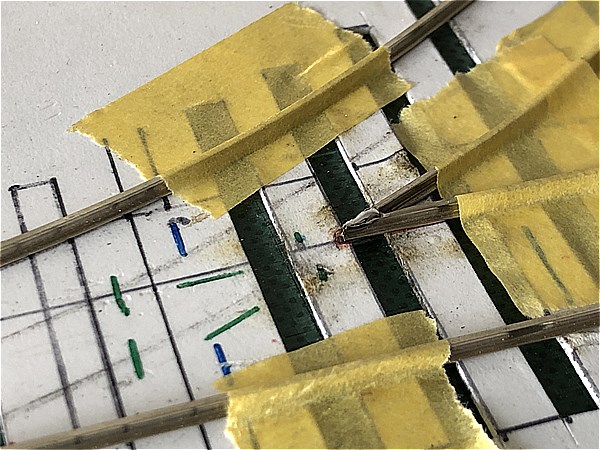
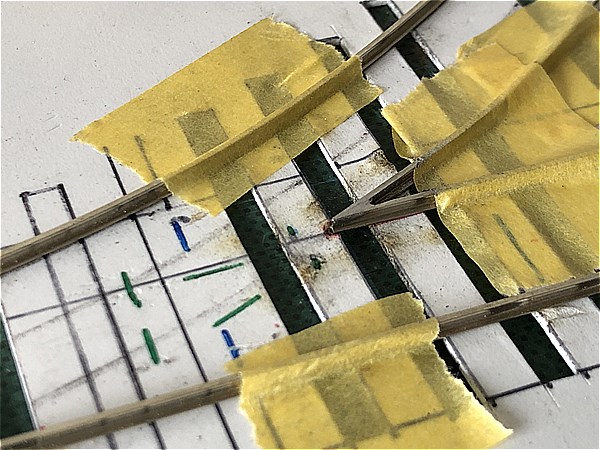
The trick to making a beautiful, precise Frog is to apply more solder.
Solder to a slight rise and ease it into shape.
And be careful that the solder is not thicker than the rail.
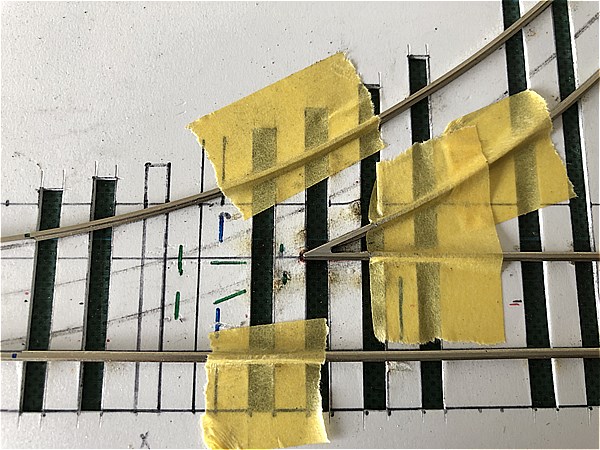
The "Frog + Frog Rail (Running Rail)" is now complete.
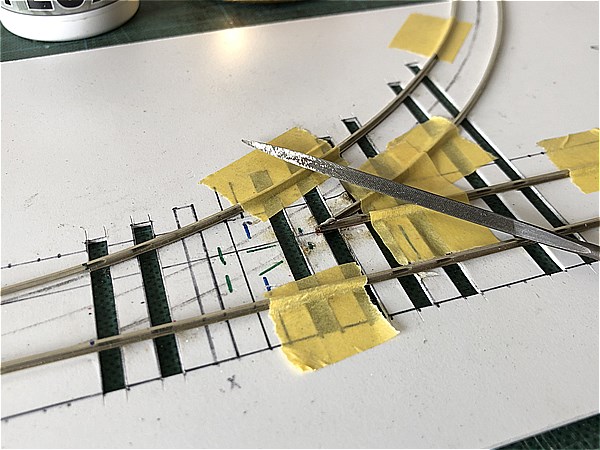
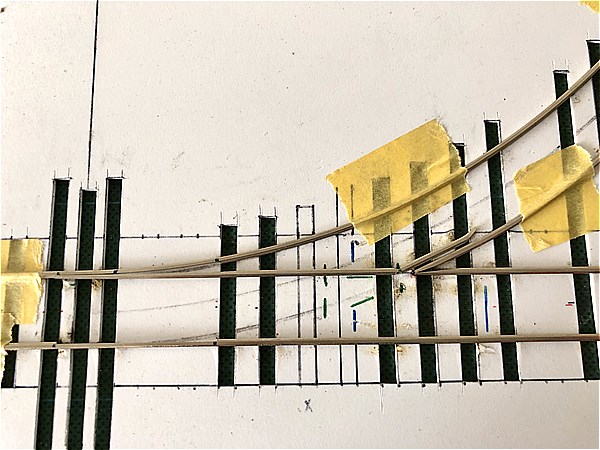
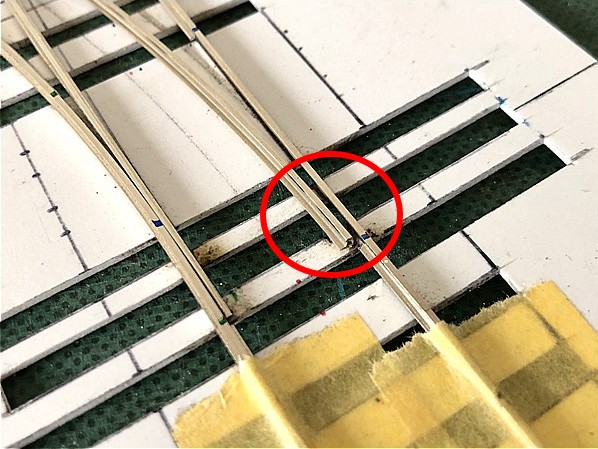
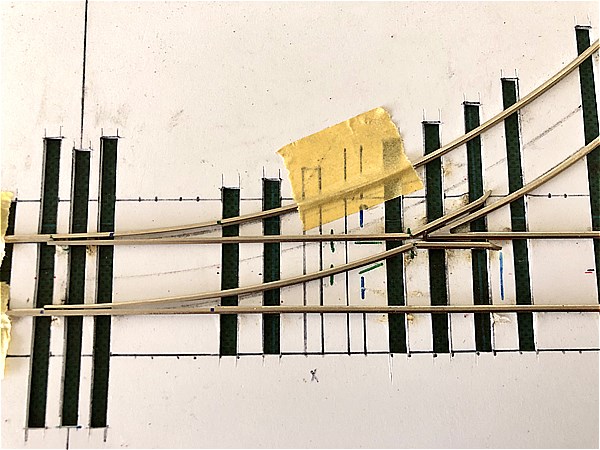
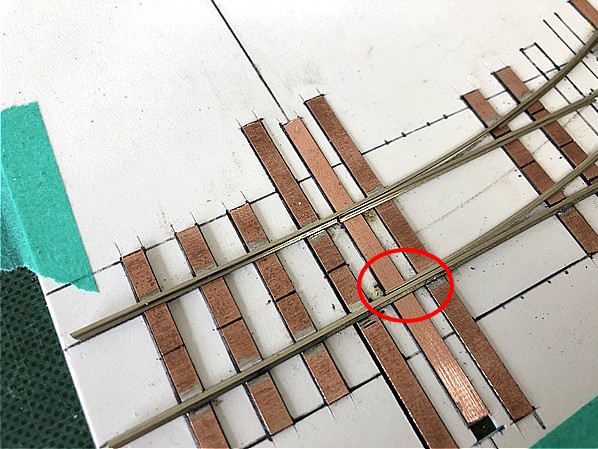
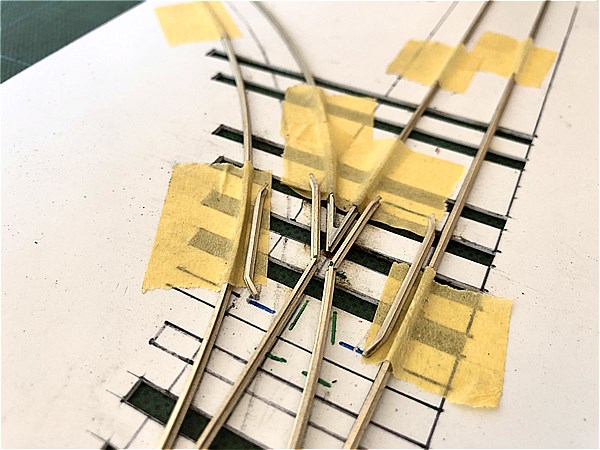
4.Making the Switch Point Rail (Tongue rail)+ Closure Rail + Wing Rail
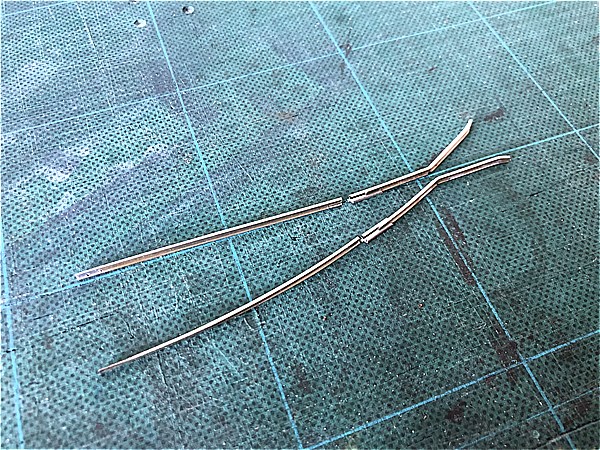
These are the most important parts of a handlaid turnout.
They are cut at the Closure Rail section and connected with joiners.
Straight Closure Rail
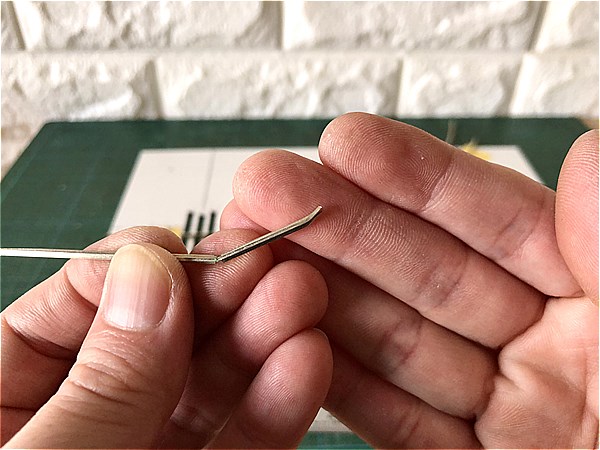
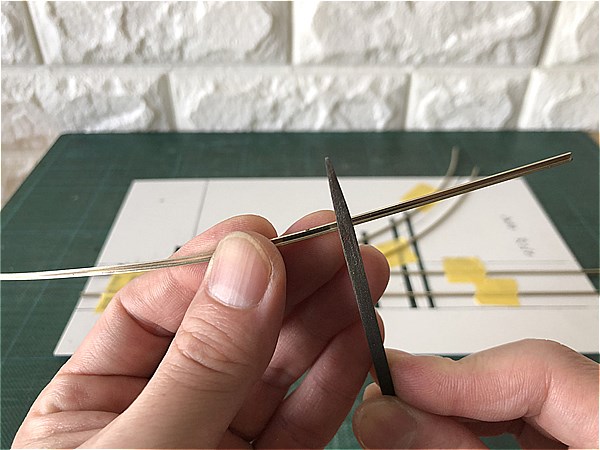
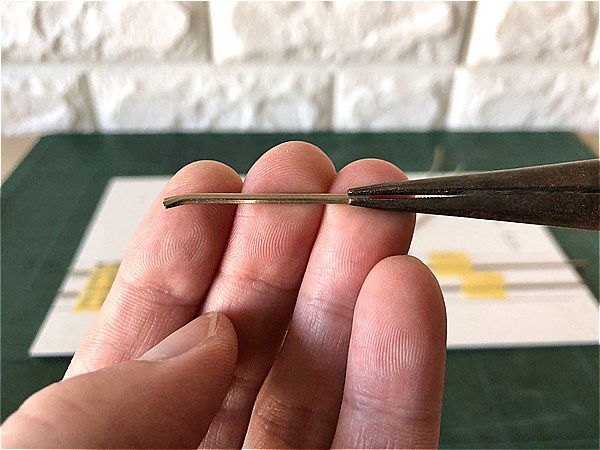
First, make the Switch Point Rail (Tongue rail).
The Switch Point Rail (Tongue rail) needs to be made even thinner and sharper than the Frog, as it needs to be perfectly aligned with the Stock Rail.

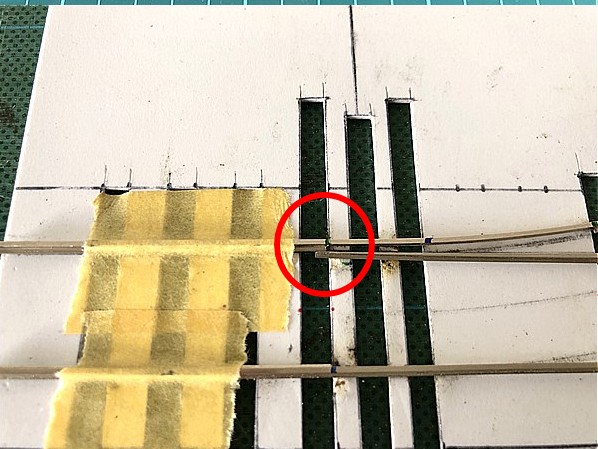
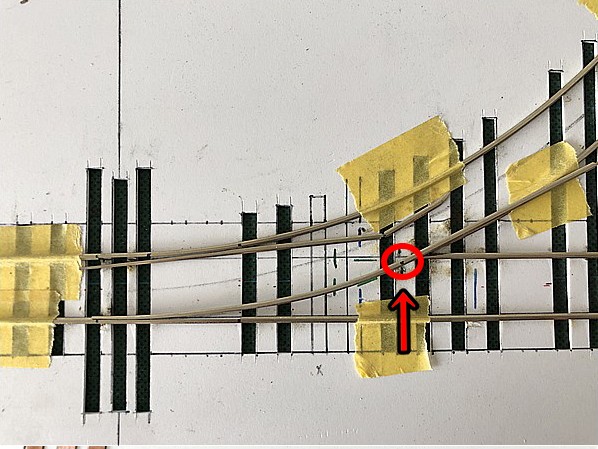
Next, make the Wing Rail.
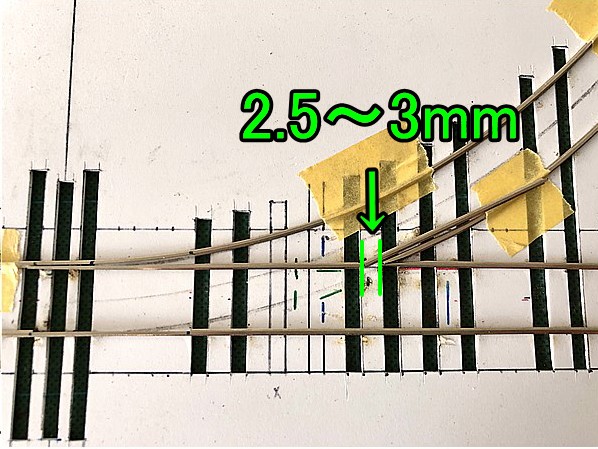
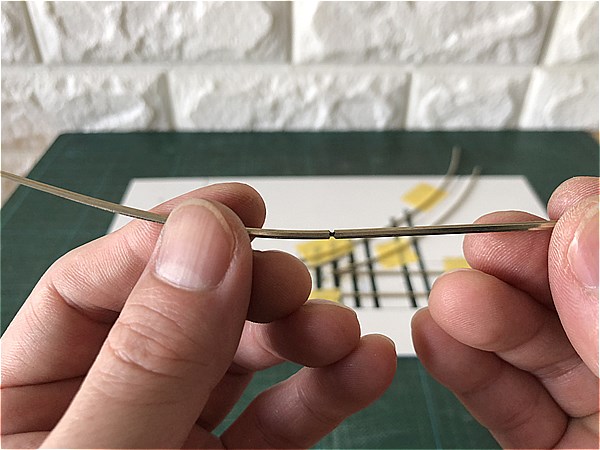
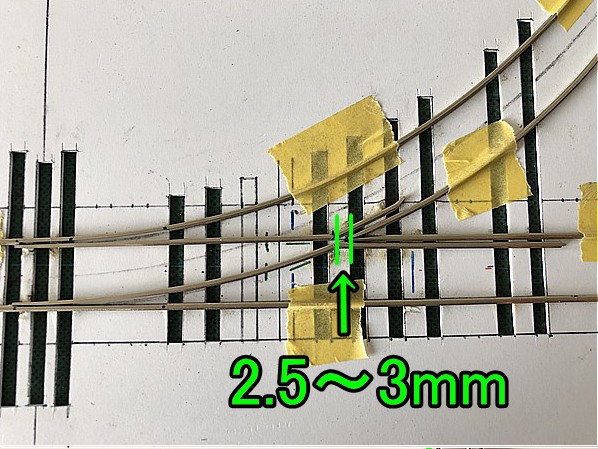
The Wing Rail is made by making a cut in the Closure Rail and bending it towards the Branch Line. The position of the bend should be about 2.5 - 3.0mm (0.118") from the tip of the Frog.
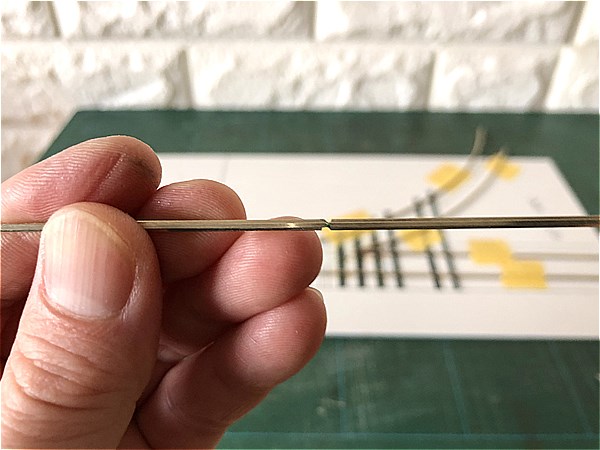
It is important to leave the Switch Point Rail (Tongue rail ) a little longer at this point.
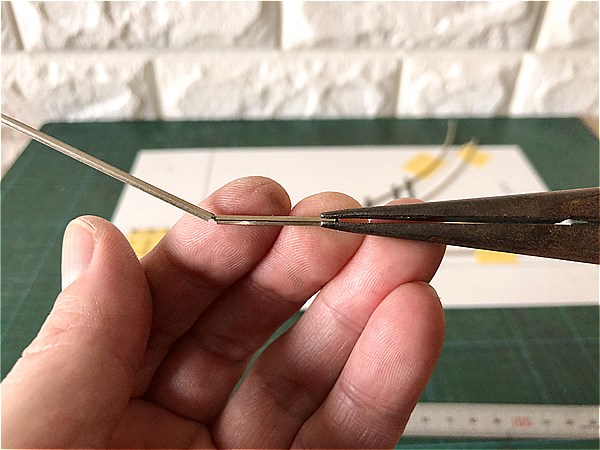
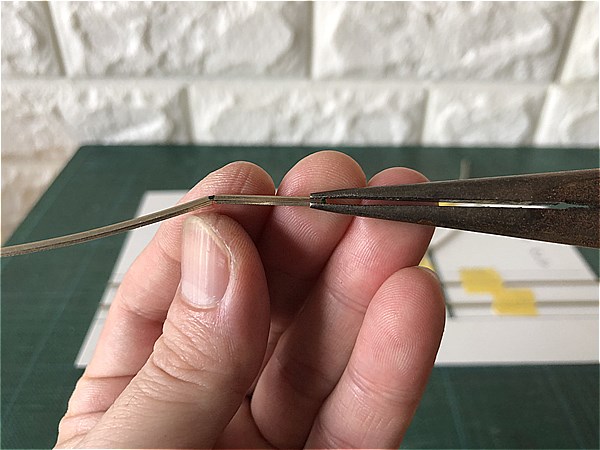
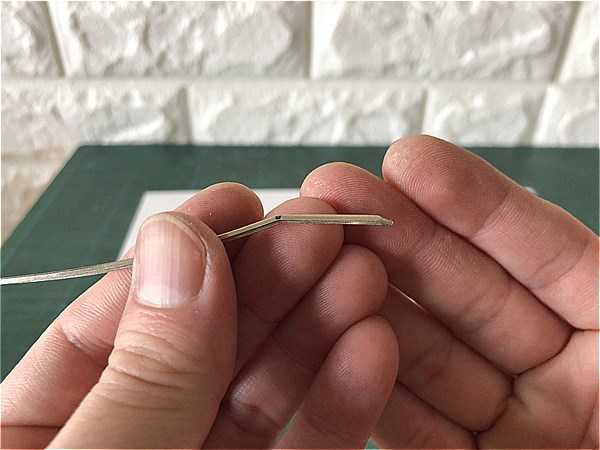
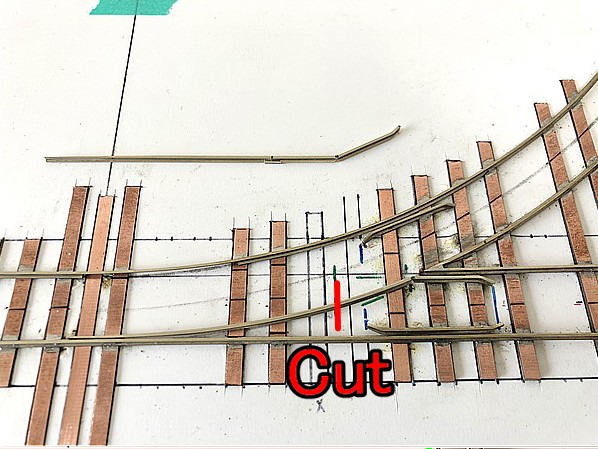
Explains why the Switch Point Rail (Tongue rail) is left longer. When the rail is cut with a nipper, one side of the cut surface is always crushed. So it is necessary to re-cut and file the cut surface.
The part that fits into the stock rail will be fine-tuned later, and the Switch Point Rail (Tongue rail) should be made with 3-5.0mm (0.197") of length to spare.
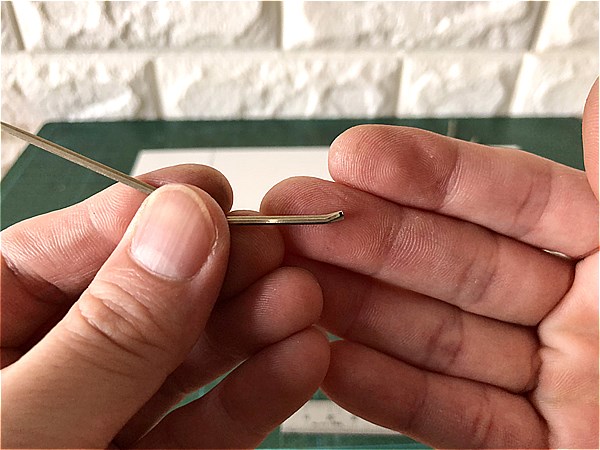
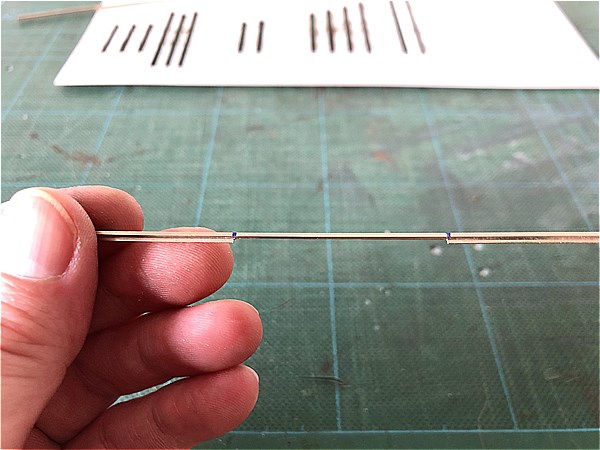
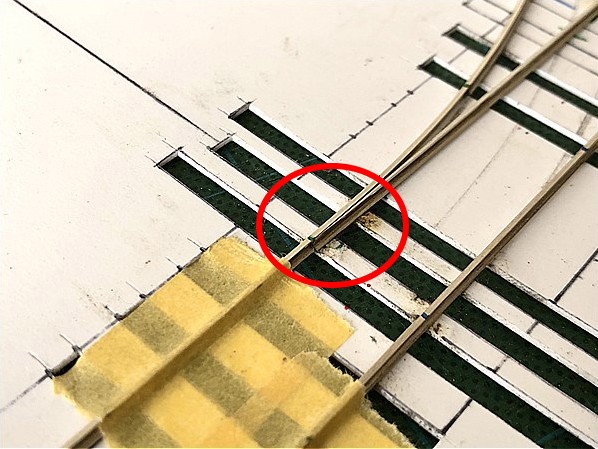
Cut the Wing Rail to the appropriate length as shown in the image.
Then bend the end of the Wing Rail slightly inwards and file it.
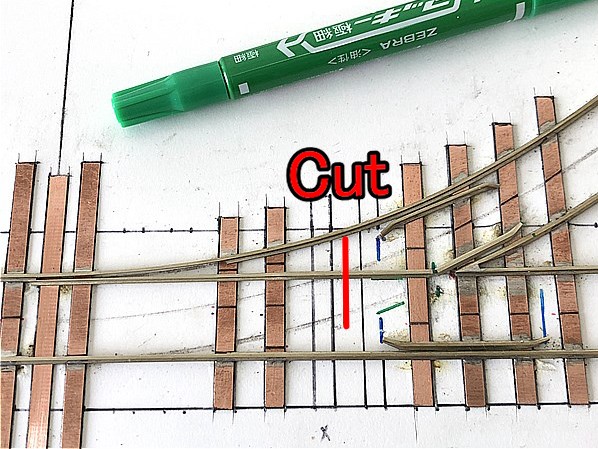
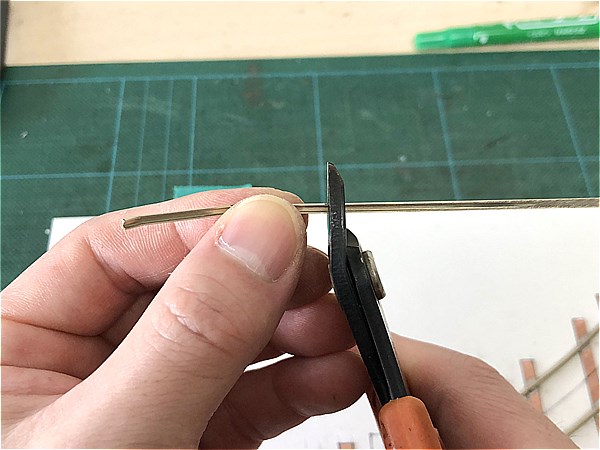
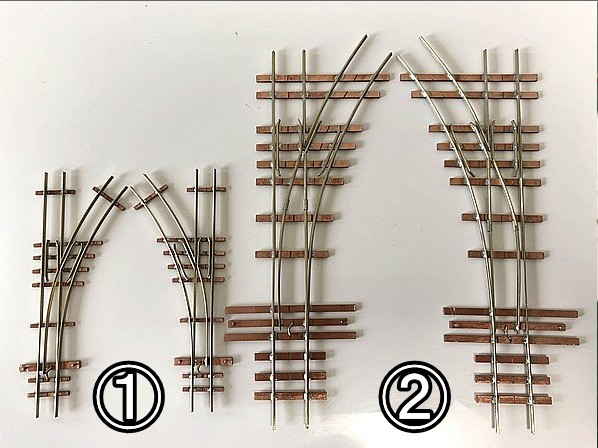
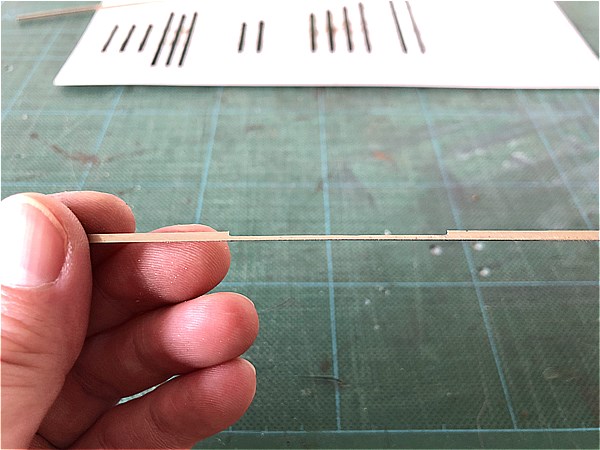
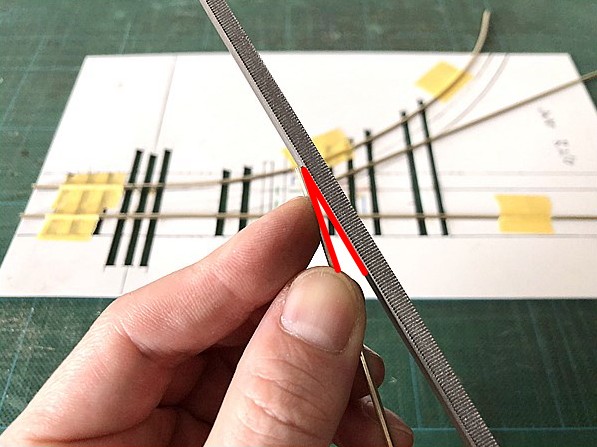
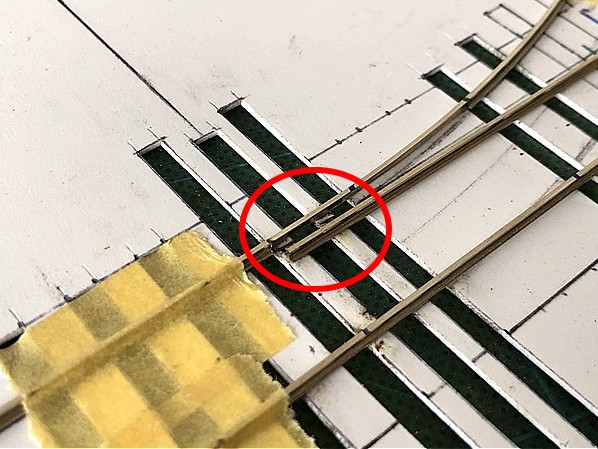
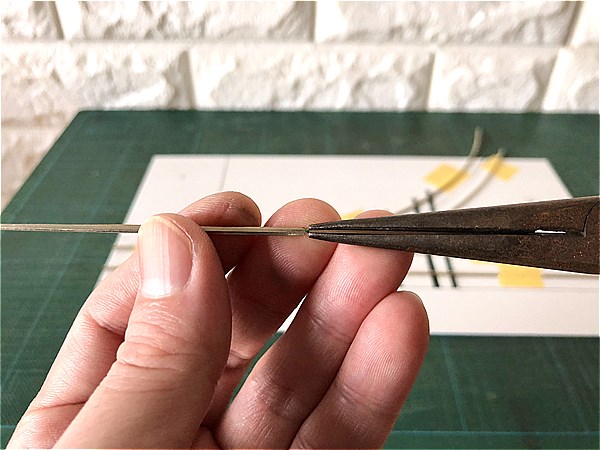
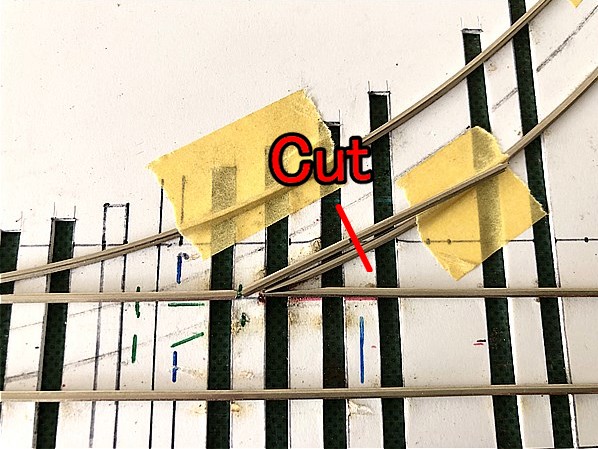
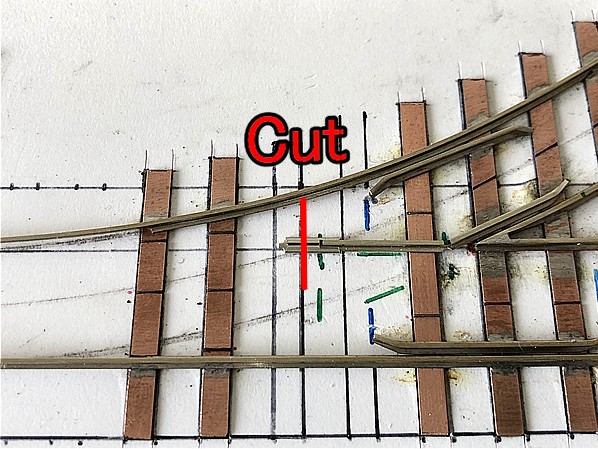
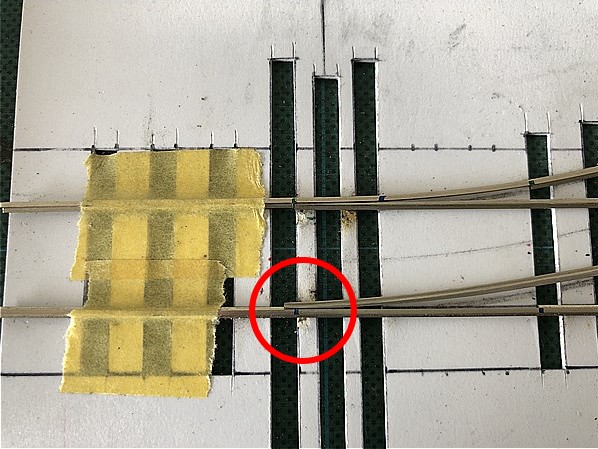
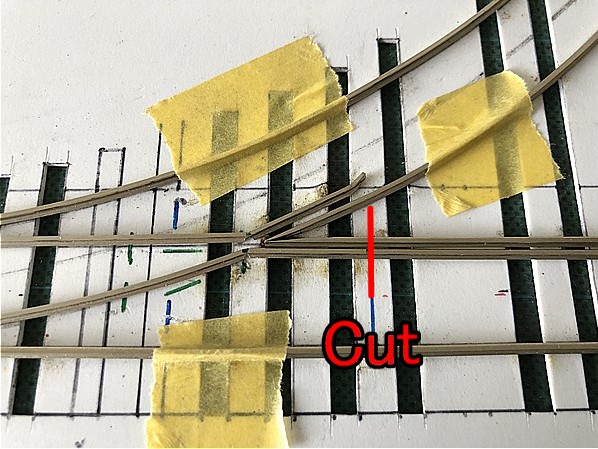
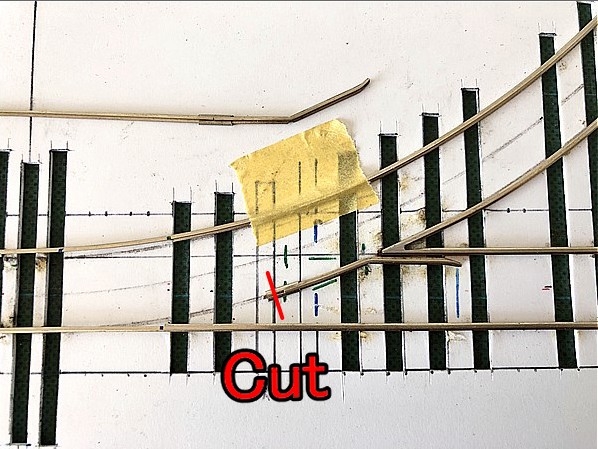
Cut at the position marked red and connect the Switch Point Rail (Tongue rail) to the Closure Rail with a joiner.
The position of the cut depends on the radius of the turnout!
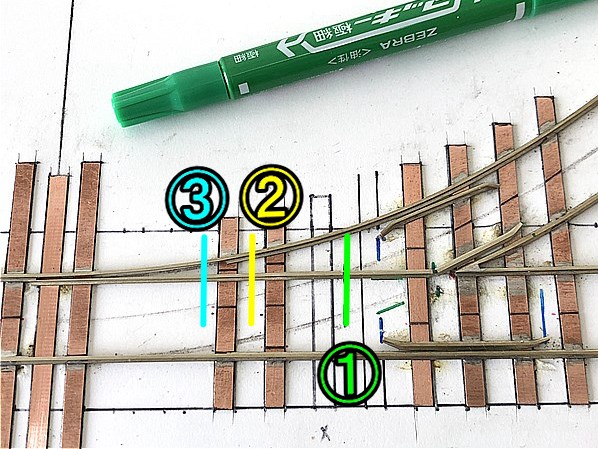
In this case, the cut was made at position ①, but for larger radius turnout, position ② and ③ are also acceptable.
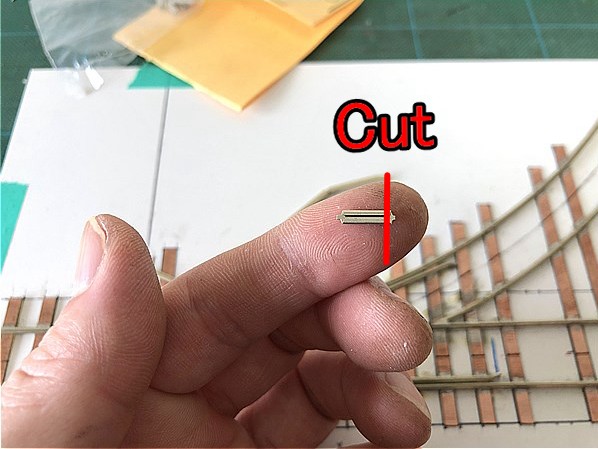
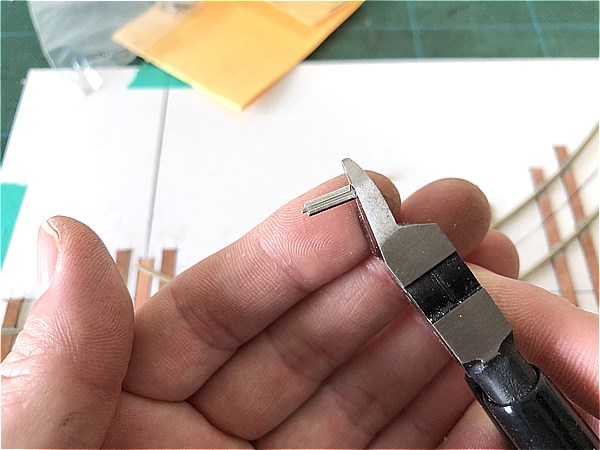

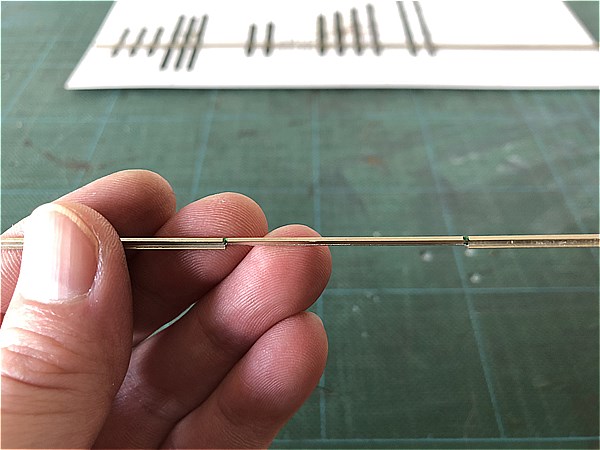
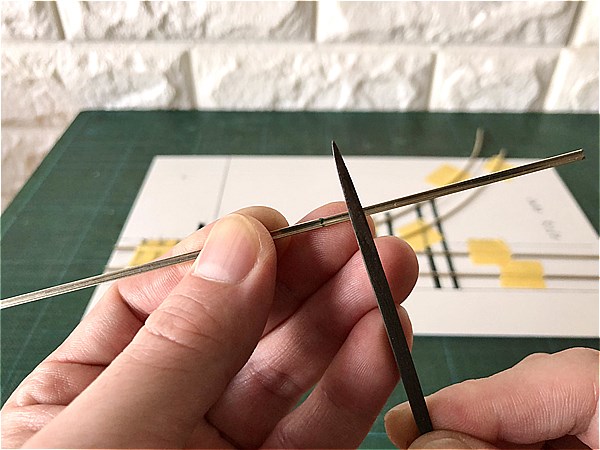
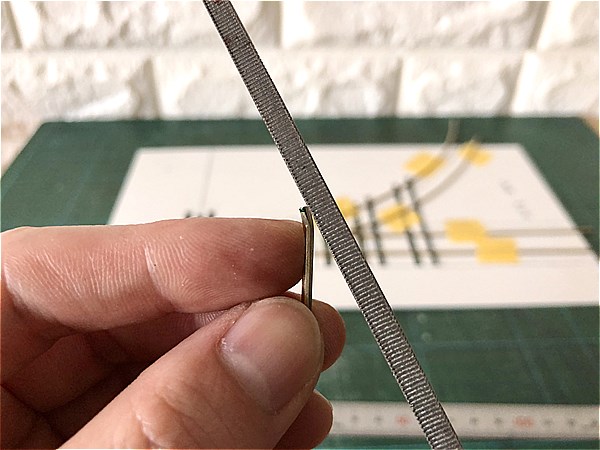
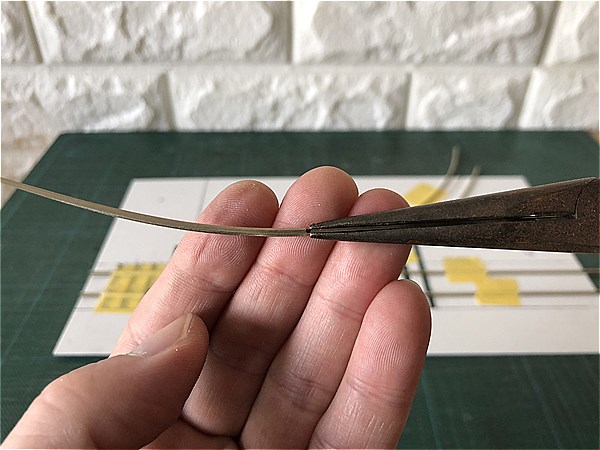
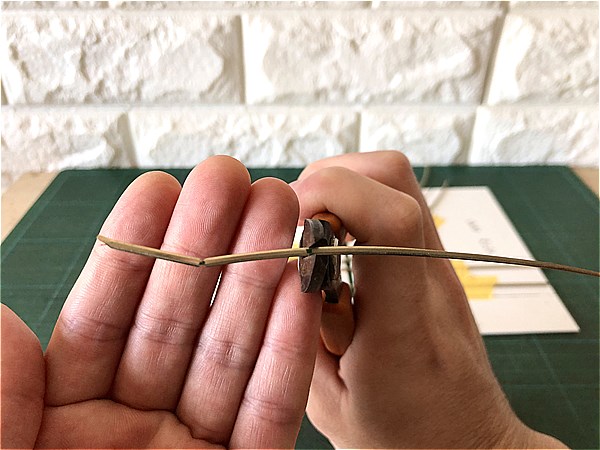
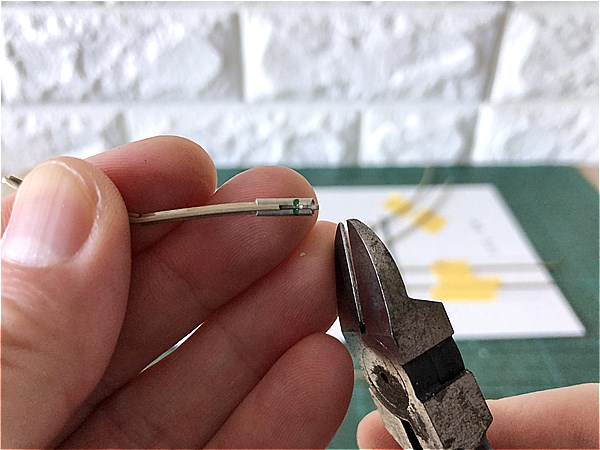
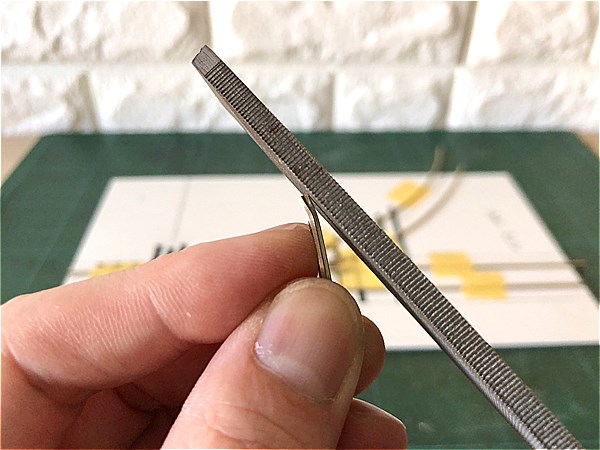
The joiner should first be cut slightly on one side, as it needs to fit between the sleepers.
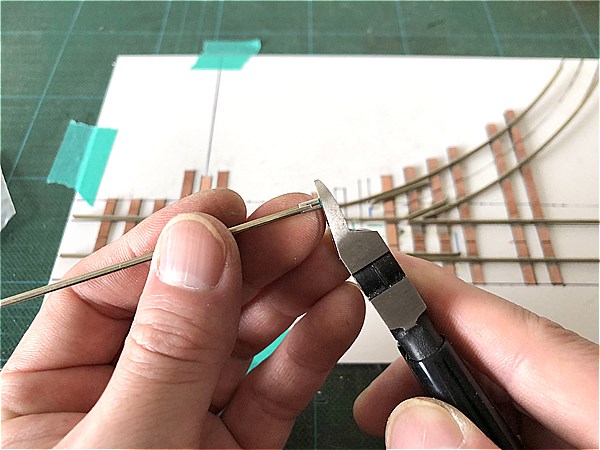
Attach the joiner to the Closure Rail. Then cut the joiner to a length that fits between the sleepers according to the template.
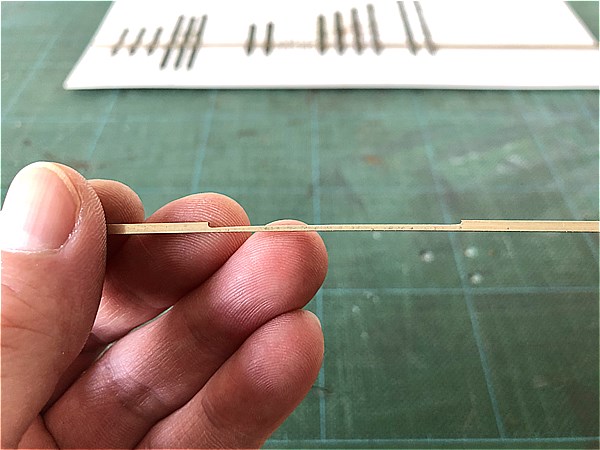
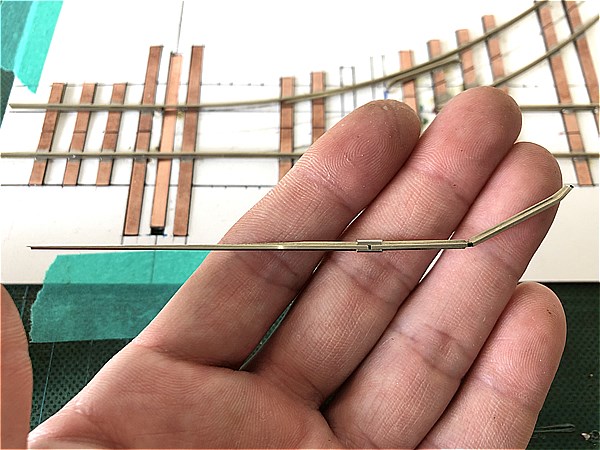
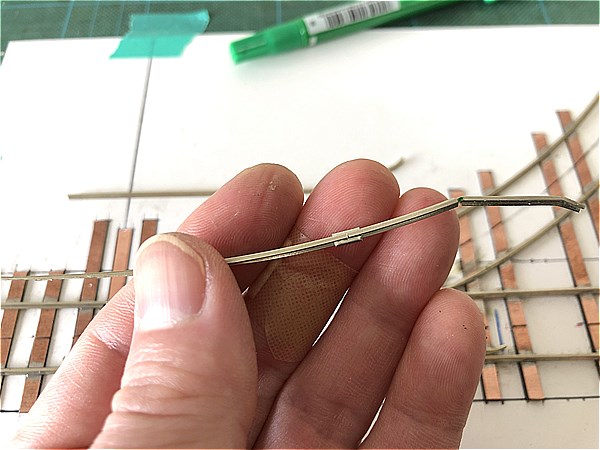
Adjust the length of the Switch Point Rail (Tongue rail) left a little longer and connect it to the Closure Rail with the joiner.

Check that the Switch Point Rail (Tongue rail) fits into the Stock Rail.
If it does not fit properly, remove it from the joiner and correct it.
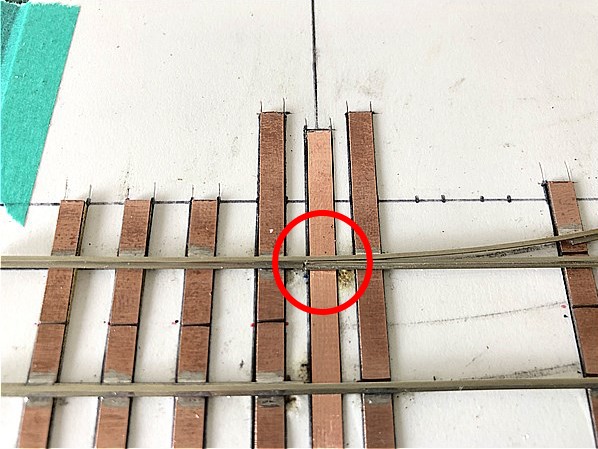
Also check that the joiner fits between the sleepers.
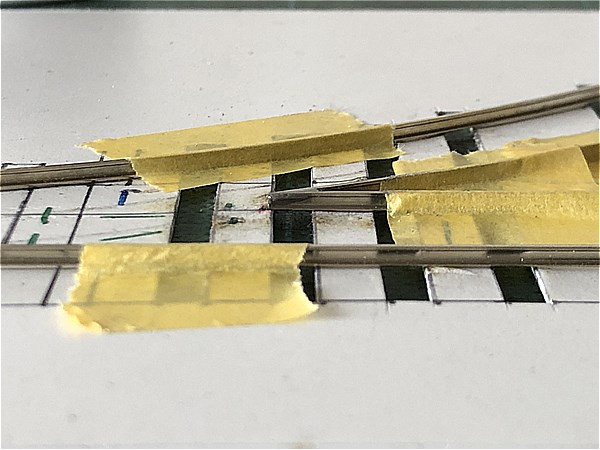
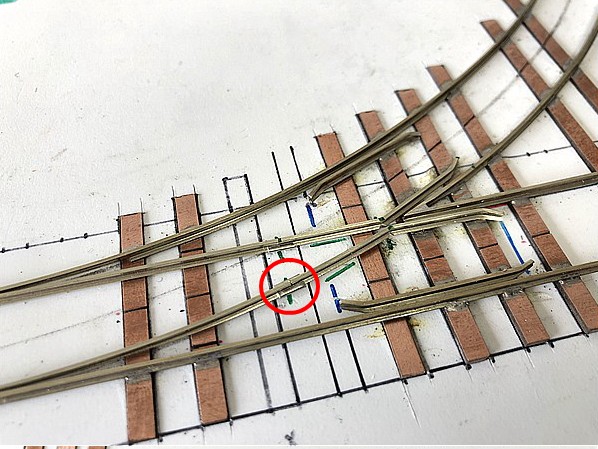
Curved Closure Rail
The making process is basically the same as for the Straight Closure Rail.
The only difference is that the rail rollers are used to bend the rail.
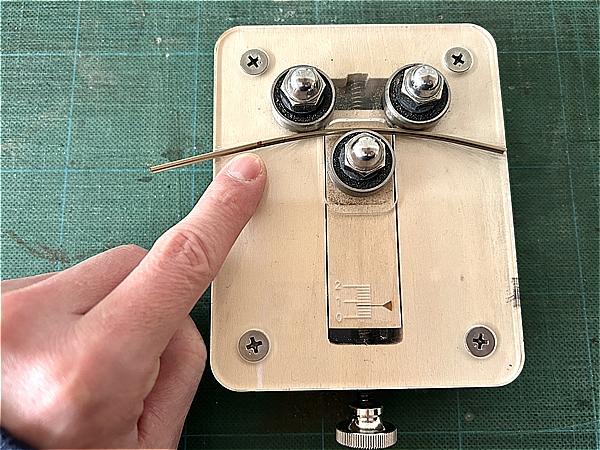
Bend the rail with rail rollers to match the draft.
The border between the Closure Rail and the Wing Rail is marked in advance.
This is because the Wing Rail must not be bent.
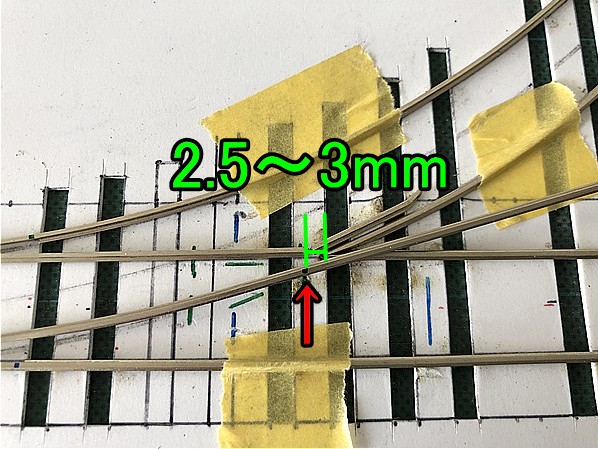
The Wing Rail is cut into the Closure Rail section and bent towards the Main Line.
The bend should be made 2.5 - 3.0mm (0.118") from the tip of the Frog.
Leave the Switch Point Rail (Tongue rail) a little longer.
Cut the Wing Rail to the appropriate length.
Then bend the ends slightly inwards and finish by filing.
Connect the Switch Point Rail (Tongue rail) and the Closure Rail with a joiner, cutting at the position marked in red.
Cut the length of the joiner to fit between the sleepers according to the template.
Then adjust the length of the Switch Point Rail (Tongue rail), which is left a little longer.
Finally, connect to the Closure Rail with a joiner.
Check that the Switch Point Rail (Tongue rail) fits into the Stock Rail.
If not, remove it from the joiner and correct it.
And remember to check that the joiner is positioned between the sleepers.
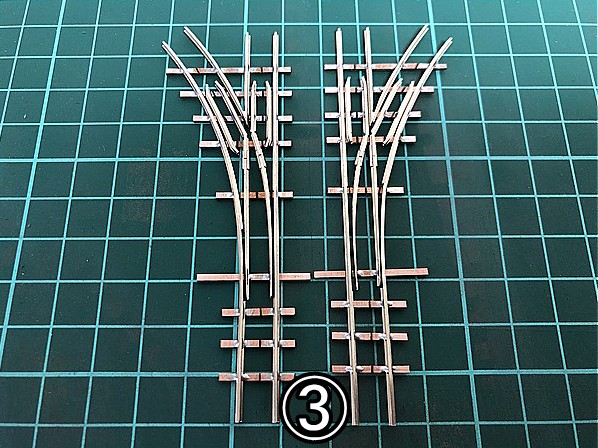
"Switch Point Rail (Tongue rail) + Closure Rail + Wing Rail" is now complete.
5.Making the Guard Rail (Check Rail)
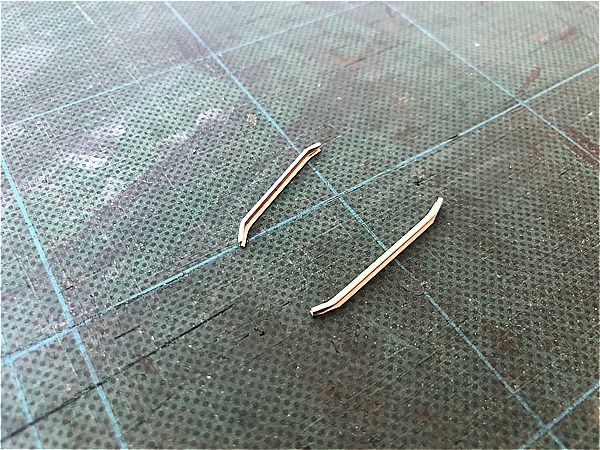
Finally, make the "Guard Rail (Check Rail)".
I make the Guard Rail (Check Rail) first, but after you have finished soldering the other parts, you can test-run the bogie and see how it works before you make it.
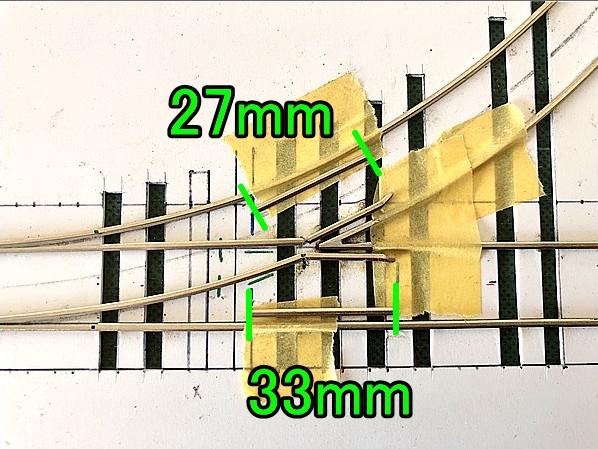

For reference, Guard Rail (Check Rail) lengths are 33.0mm (1.299") for Main Line and 27.0mm (1.063") for Branch Line.
These lengths vary according to scale and turnout radius.
Guard Rail (Check Rail) is bent slightly inwards at both ends of the Track in the same way as Wing Rail.
After filing the ends of the rail, the 'Guard Rail (Check Rail)' is complete.
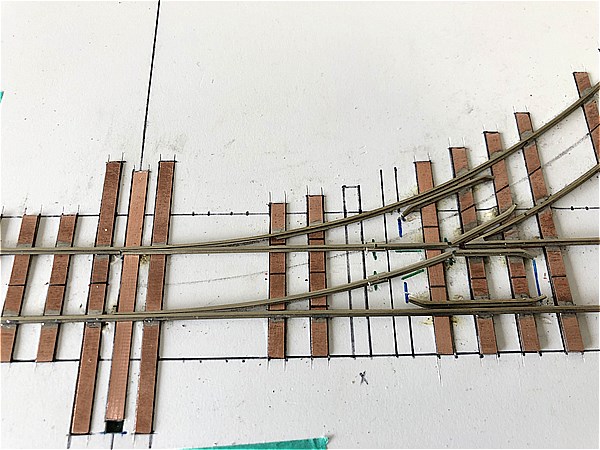
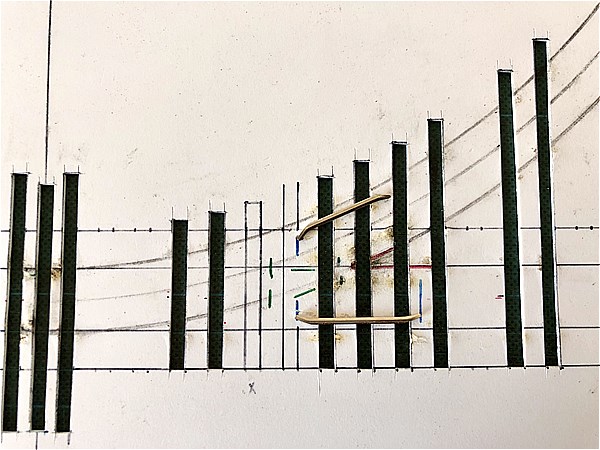
All rail parts completed
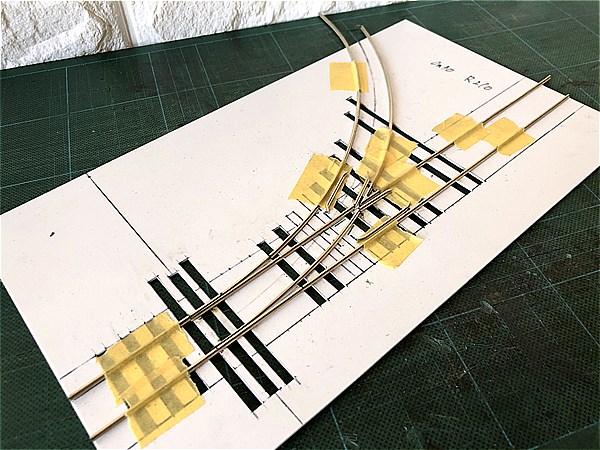
The rail parts required for Turnout are now complete.
It takes less than two hours to complete the work up to this point if you are used to it.
This is the end of the [Rail making section], thank you very much.
If there seems to be a demand, I will write a [soldering section].
Contact us
We ship internationally and accept payment via PayPal.
Please feel free to contact us to discuss your purchase or enquire about a production order.
Narrow Gauge Shop
Satoru Mimura
1-15-27,Negishi,Machida,
Tokyo,JAPAN 194-0038
E-mail narrow_gauge_shop@ae.auone-net.jp
https://www.youtube.com/c/narrowgaugeshop
https://www.pinterest.jp/narrowgaugeshop
We're very active on YouTube and Pinterest, so we'd love it if you'd subscribe to our channel (follow us) and hit the good button.https://www.pinterest.jp/narrowgaugeshop/_created/