

Hello, this is "Narrow Gauge Shop".
-
Narrow Gauge Shop in Japan, with a passion for handmade products!!
In this article, Narrow Gauge Shop explains how to accurately bend PECO HOe flexible track into circular shapes with a very small radius.
We have made and sold over 300 layout baseboards. Some of them are available on Youtube and Pinterest, so please check them out.
Youtube:https://www.youtube.com/user/narrowgaugeshop/videos
Pinterest:https://www.pinterest.co.uk/narrowgaugeshop/_created/
・…━… 目次 …━…・‥
Tools for bending track precisely
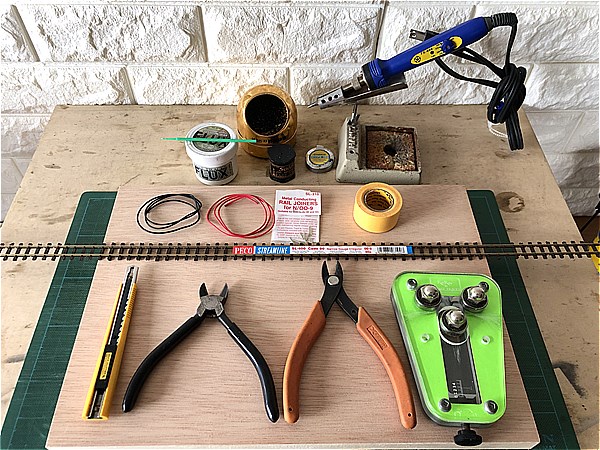
- Base Board:Art material panel
- Tracks:PECO OO-9/HOe Narrow Gauge Track (SL-400) Code 80
- Joiners:PECO Rail Joiners for N / OO-9 (SL-310) Code 55 & 80
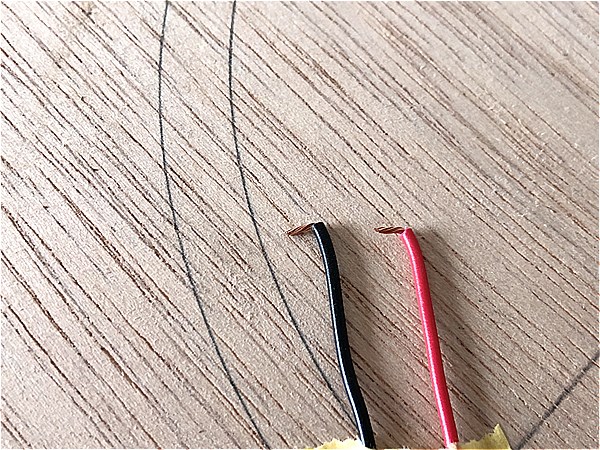
- Power Feeder Cord
- Fast Tracks Rail Roller
- Soldering iron
- Fast Tracks Small Diameter Solder - 15ft Roll
- Fast Tracks own Track Building Solder Flux
- XURON Track Cutters, For HO 00 N and Z Gauge Rails
- Nipper
- Masking Tape
How to accurately bend PECO flexible track to make small circular shapes
Our making procedure is as follows.
- Draw a circular draft on the baseboard
- Pulling the tracks out of the sleepers
- Bending tracks using "Rail roller"
- Bent track back to sleepers
- Joining the tracks
- Install feeder wires
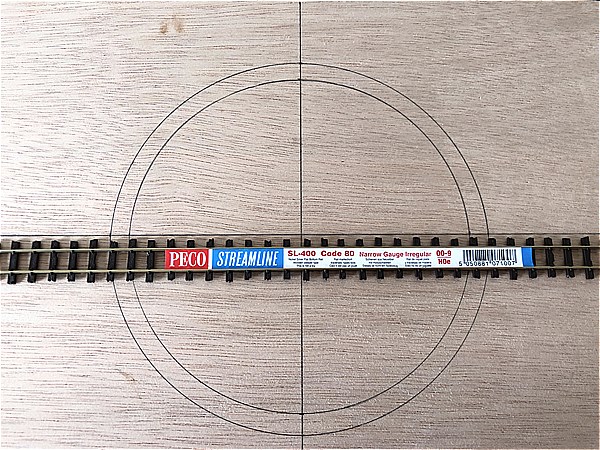
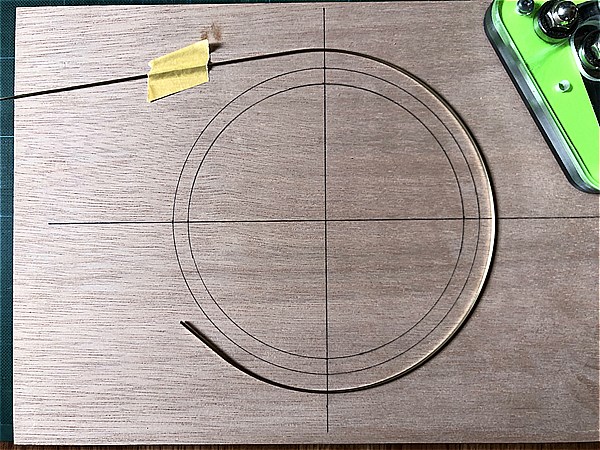
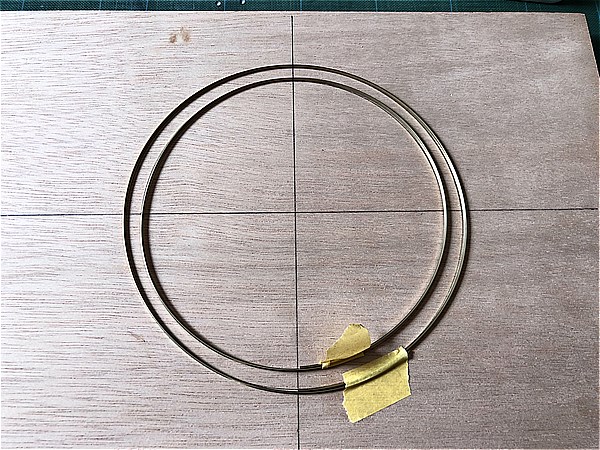
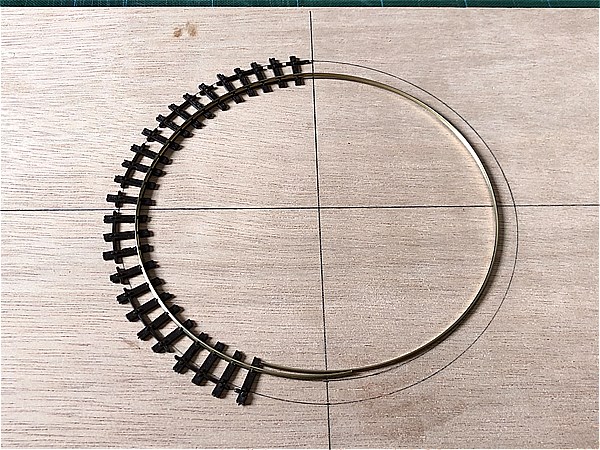
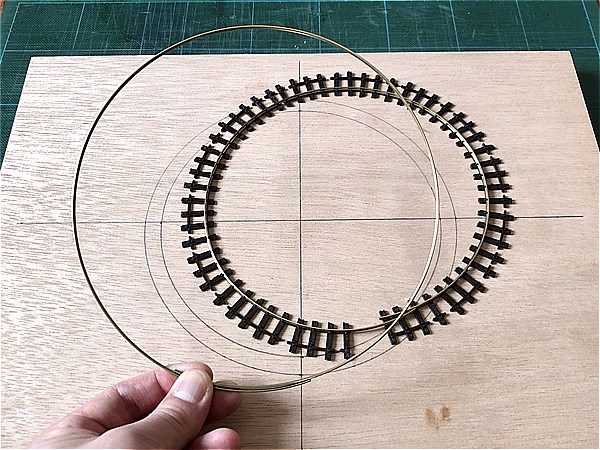
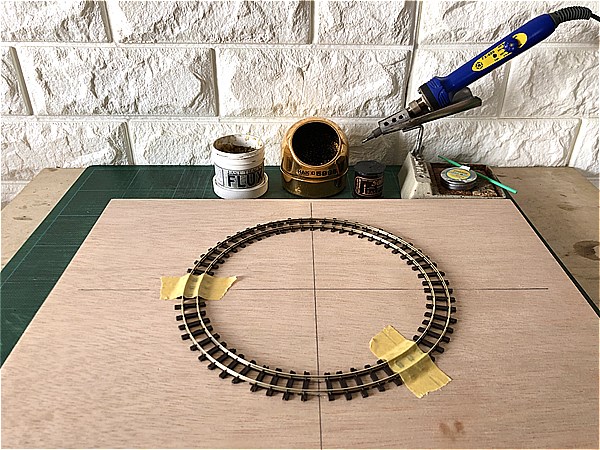
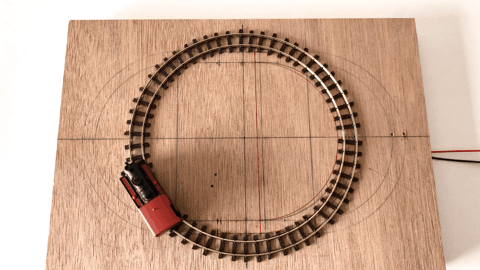
1.Draw a circular draft on the baseboard
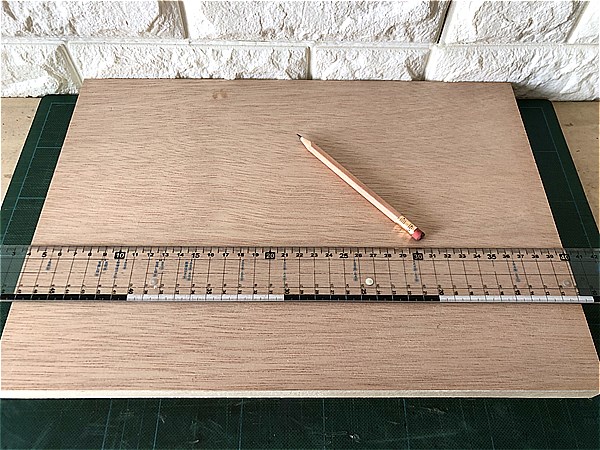
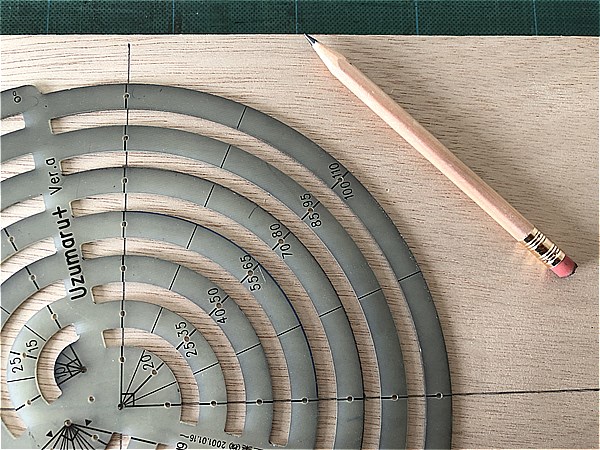
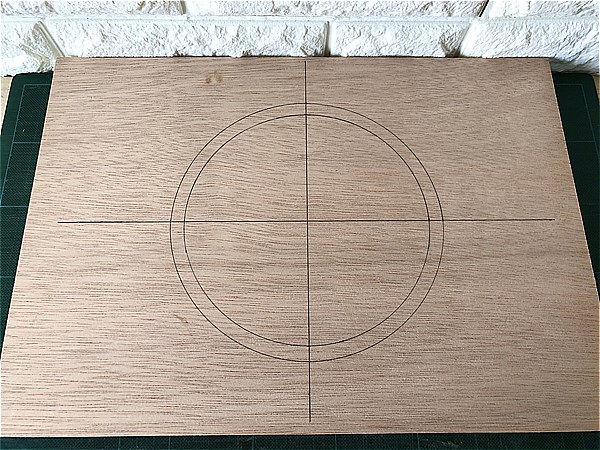
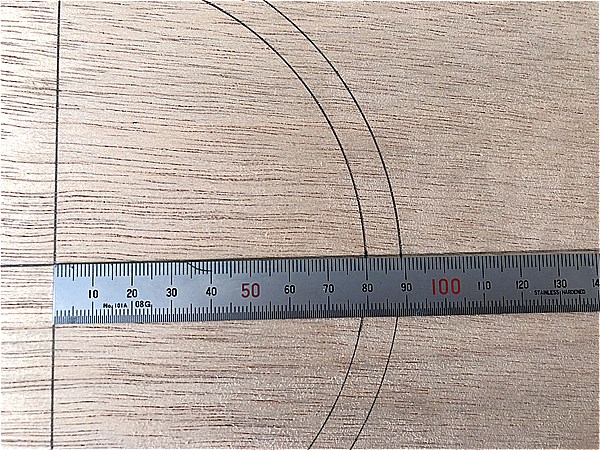
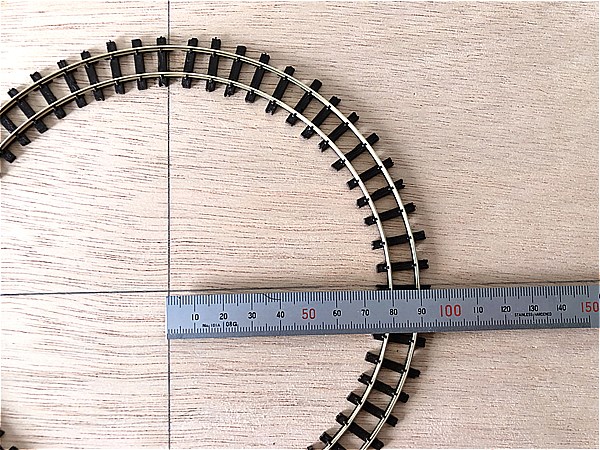
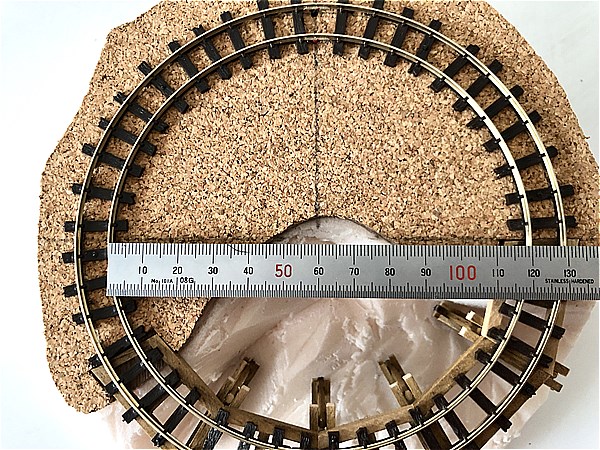
Initially, draft on the base board with the radius of your choice.
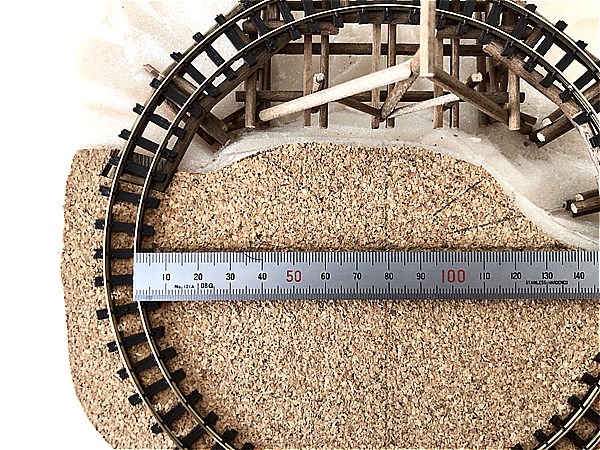
In this case, a circle track with a radius of 80 mm will be made.
This draft will be used as a guide when bending the tracks, so draw both the inner and outer tracks.
Checkpoint
The smaller the radius, the more difficult it is to bend the track accurately.
We recommend starting with a radius of around 100 mm and practising.
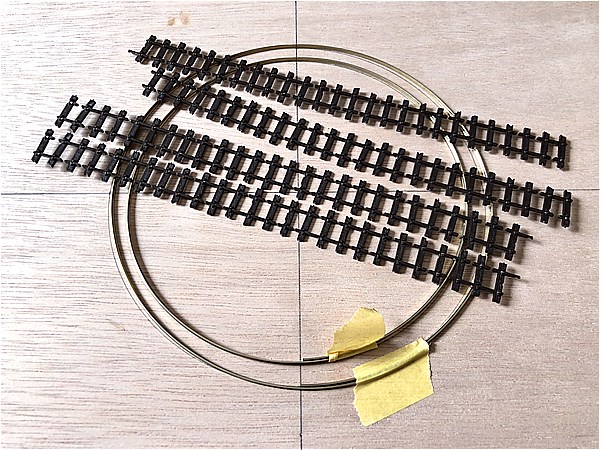
2.Pulling the tracks out of the sleepers

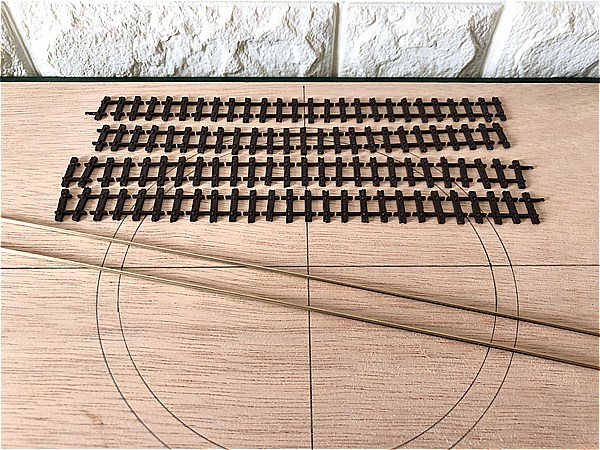
As the track is difficult to pull out as it is, the sleepers are first separated.
PECO flexible track (914 mm) has the sleepers split into four sections.
Be careful not to pull them out with force as this will distort the track.
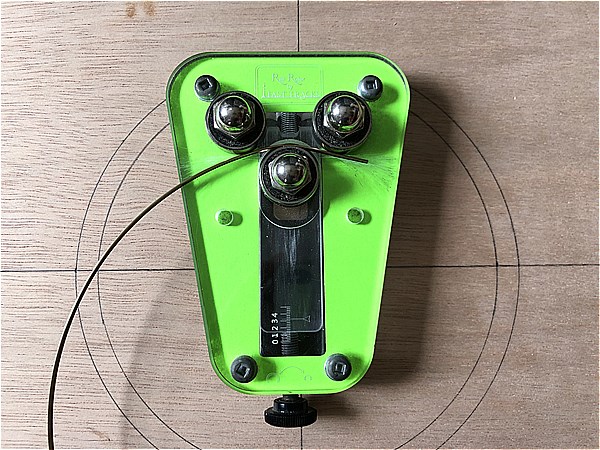
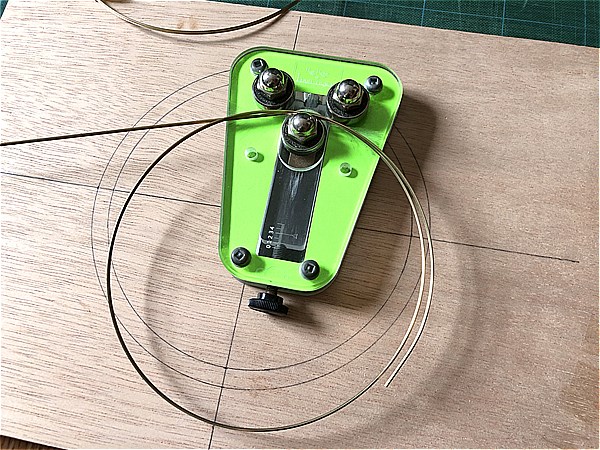
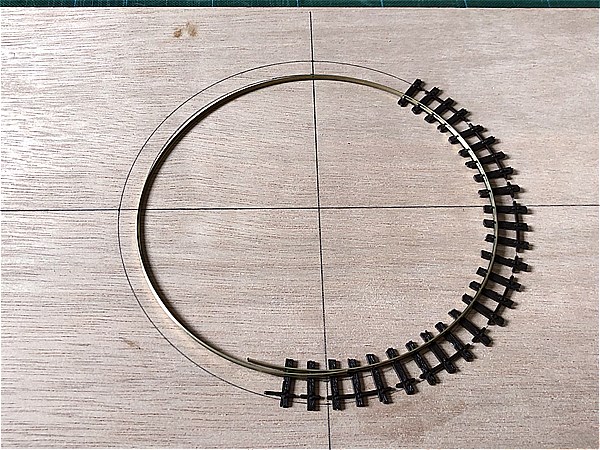
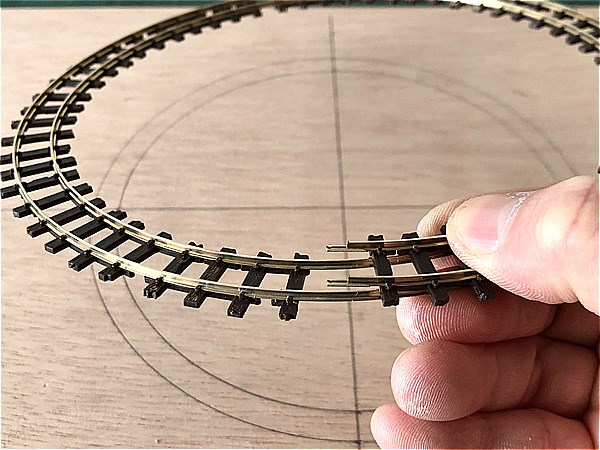
3.Bending tracks using "Rail roller"
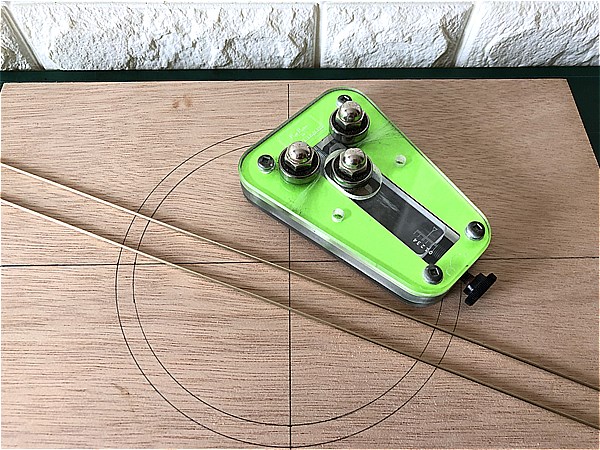
This is the most important process.
This process determines the quality of the finished product, so do it carefully.
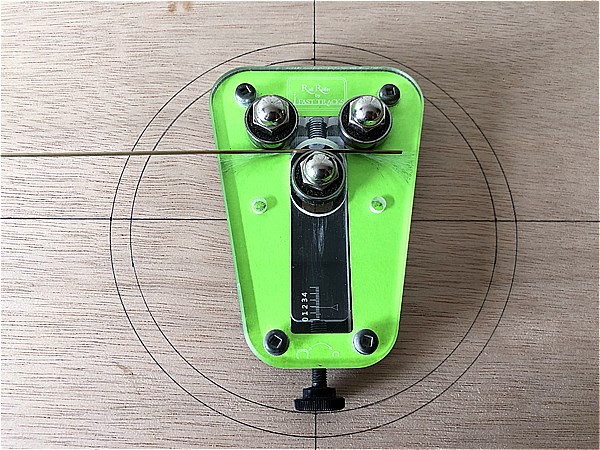
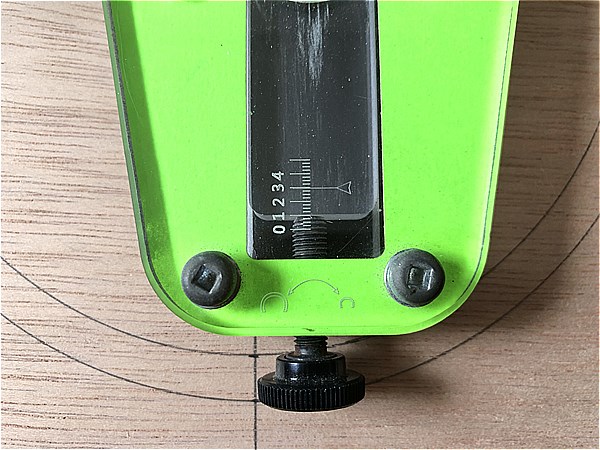
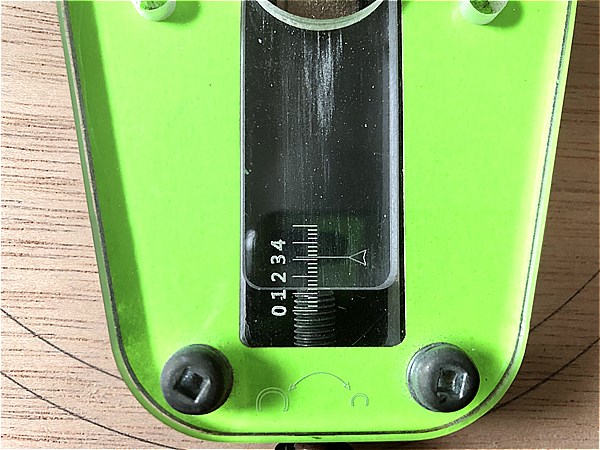
At first, try bending the scale to the "3" position.
As you get used to it, you will get a feel for the relationship between the position of the scale and the bend.
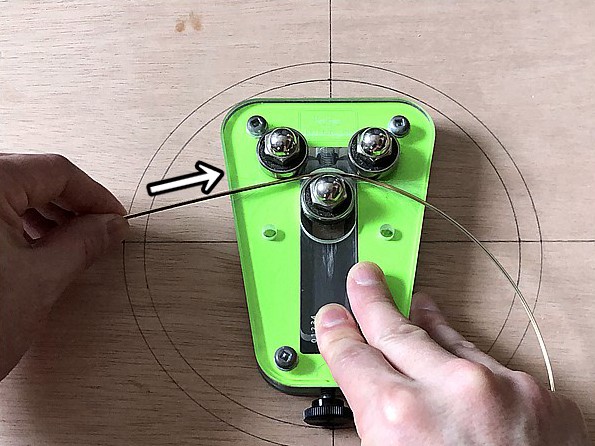
When using a "Rail roller", imagine 'pushing' the track out of the bender rather than 'pulling' it out.
This is another important point that makes a difference to the finished product.
You have to push the tracks out. Never pull it out.
During the process of bending the track, it is obvious that you have not bent it enough.
In this case, change the position of the scale and bend again.
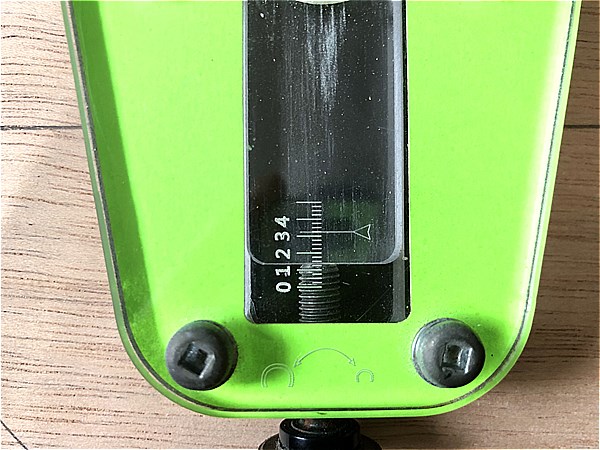
Raise the scale by one position and bend the track further.

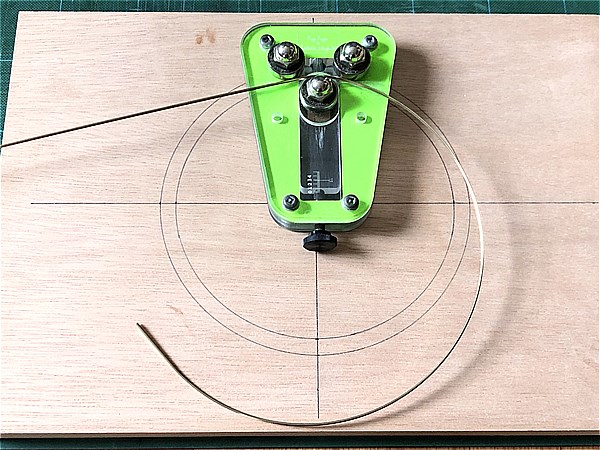
This time it looks good.
The track bends are corrected somewhat when you put it back into the sleepers, so you just need to bend it a little harder.
Checkpoint
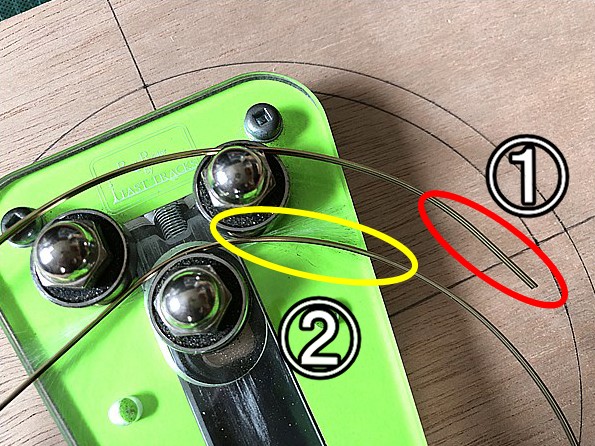
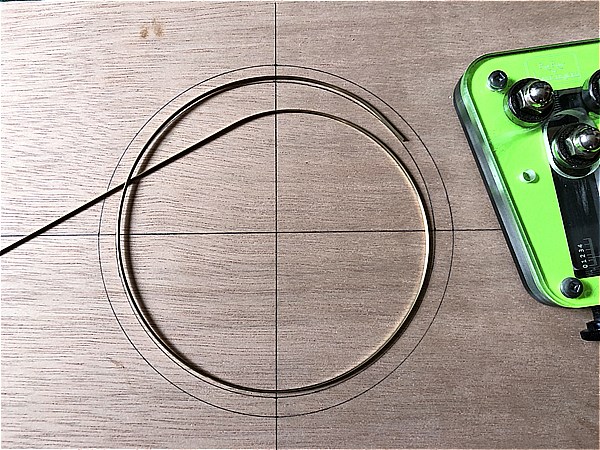
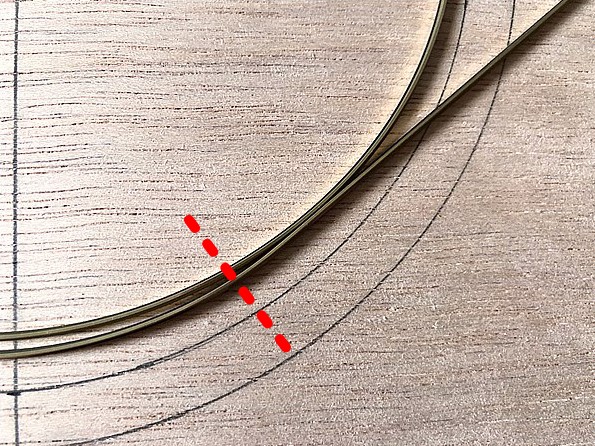
Due to the construction of the "Rail roller", it cannot be bent 2-3 cm from the starting point (①).
Bend the track with enough clearance so that the curved parts of the inner and outer tracks overlap (②).
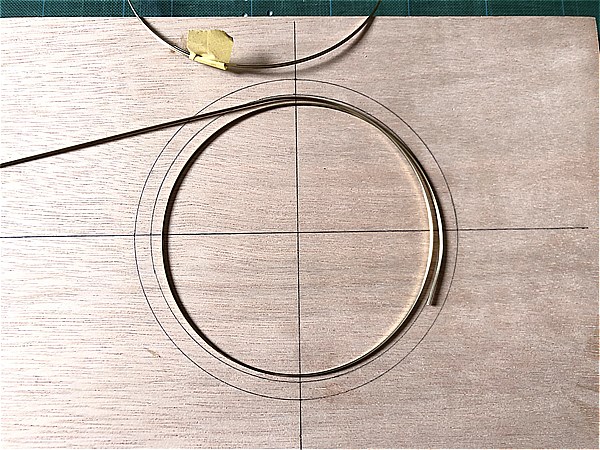
Overbent tracks can be corrected by hand, if only slightly.
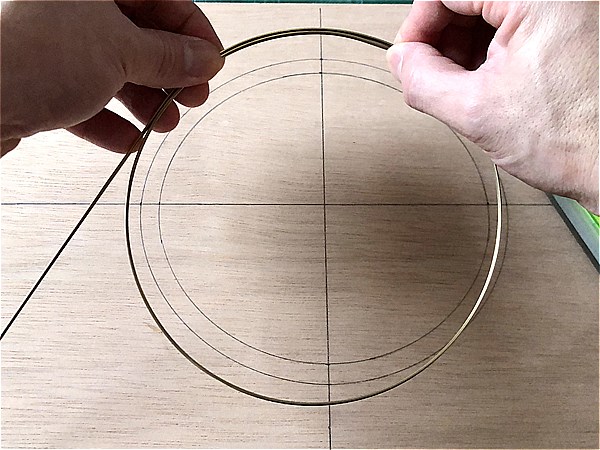
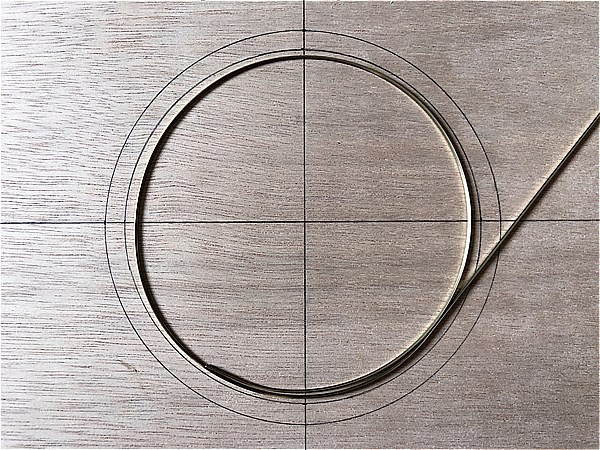
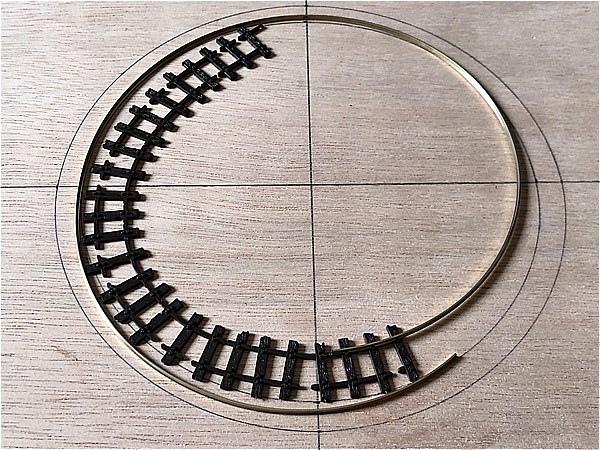
Fine-tune the tracks to a clean circular shape to match the draft.
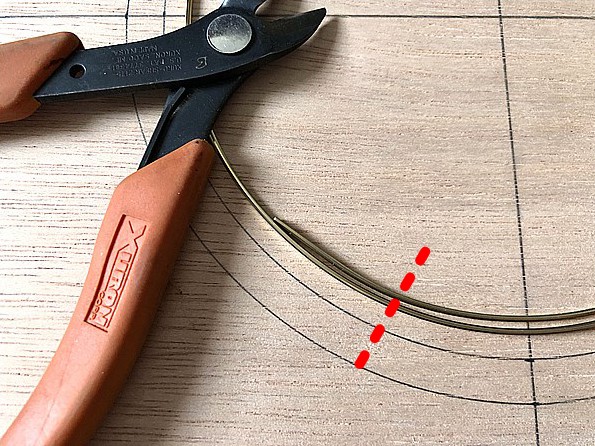
Cut a track 2-3 cm from the starting point of the bend and the excess at the end point.
File and trim the cut cross section.
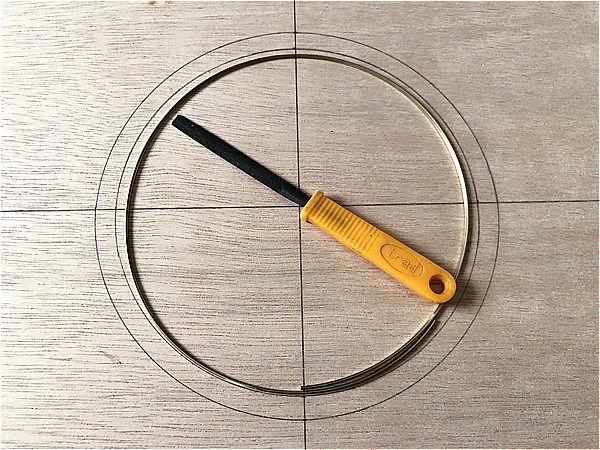
The inner track is now complete.
Then bend the outer track.
The scale on the "Rail roller" is slightly looser than when bending the inner track.
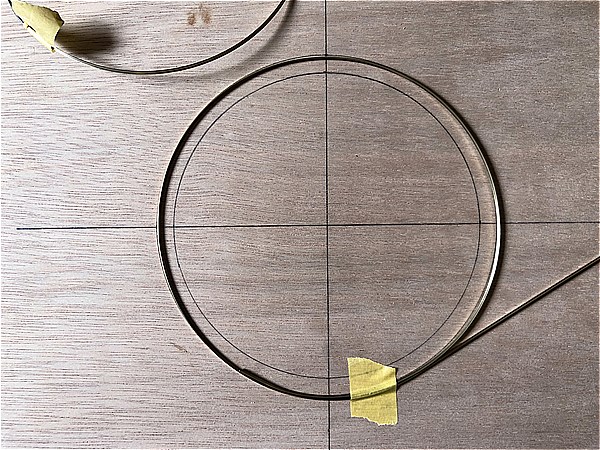
The outer track is corrected by hand in the same way as the inner track, matching the curves of the drafting.
Cut the excess and the tracks are complete.
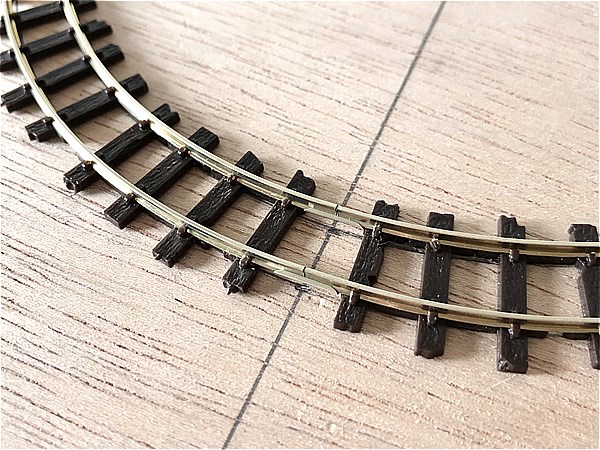
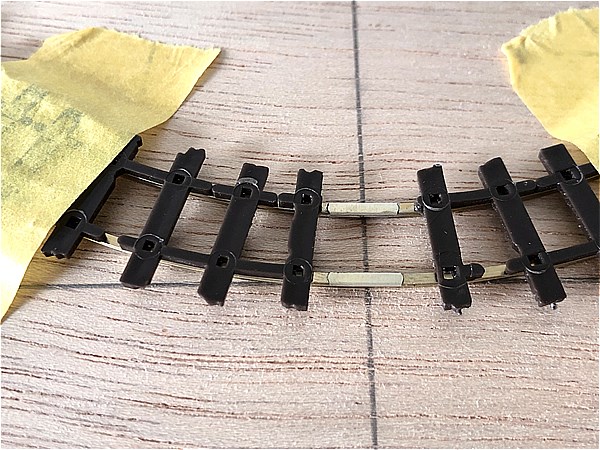
4.Bent track back to sleepers
Put the bent tracks back into the sleeper.
Do not put the inner and outer tracks back into the sleeper at the same time, but do one of them at a time.
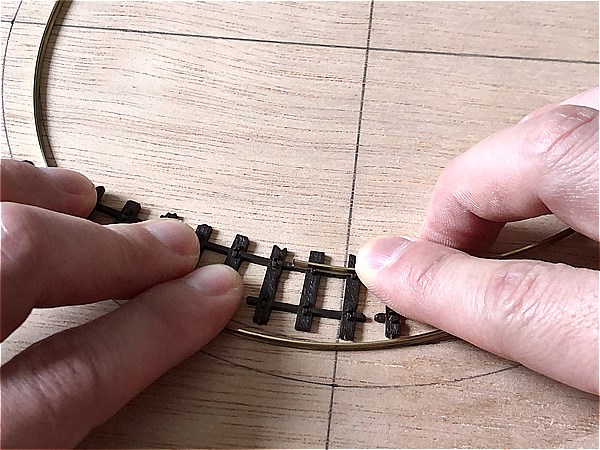
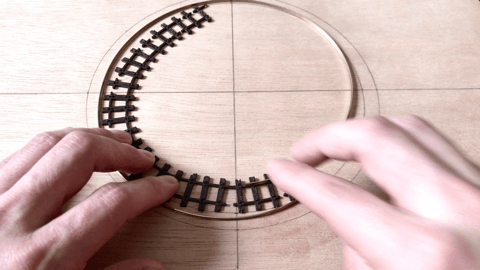
Work carefully to avoid damaging the part of the sleeper where the track is fitted into the sleeper.
Imagine pushing the tracks back into the sleepers with the belly of your thumb.
If the track is difficult to fit back into the sleeper, file the cross-section of the track to make the work easier.
Checkpoint
Working with the sleeper side bent to match the draft, the track returns smoothly to the sleeper.
Next to the inner track, the outer track is put back into the sleeper.
The inner track also bends the sleeper, making the work on the outer track easier.
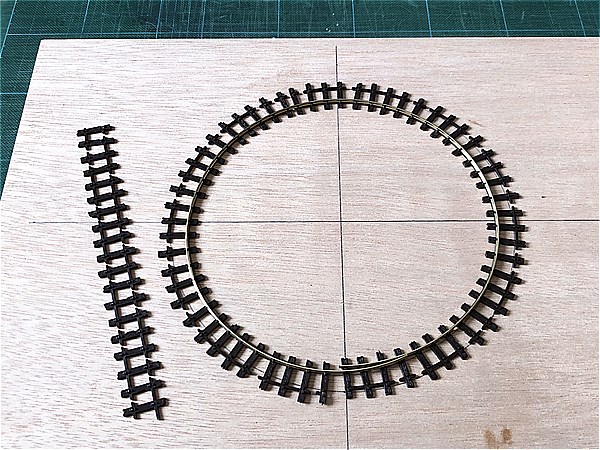
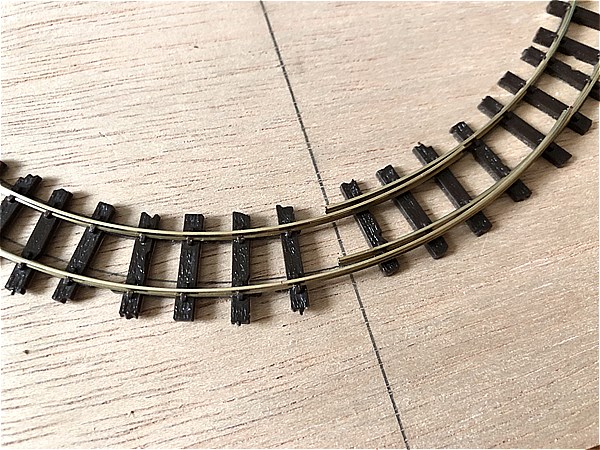
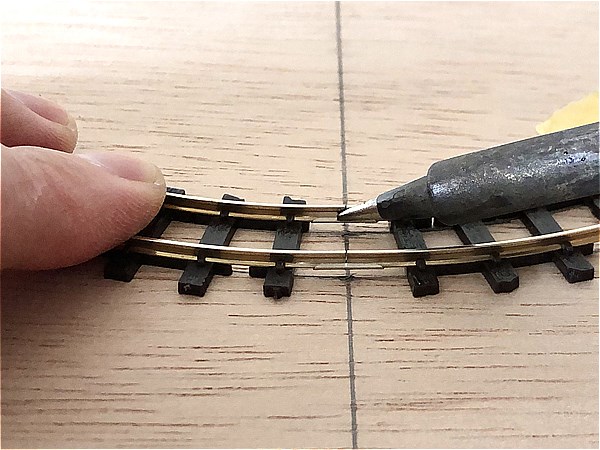
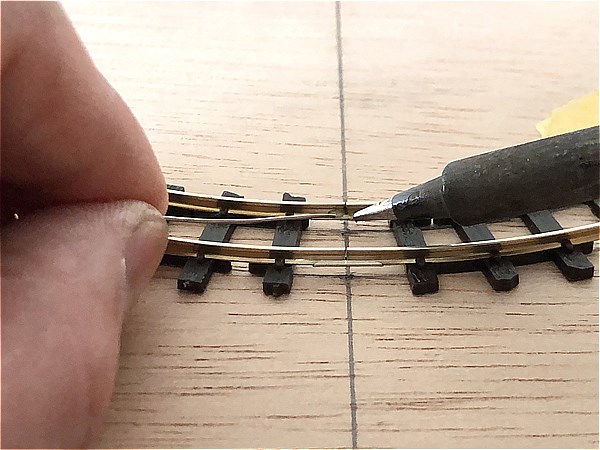
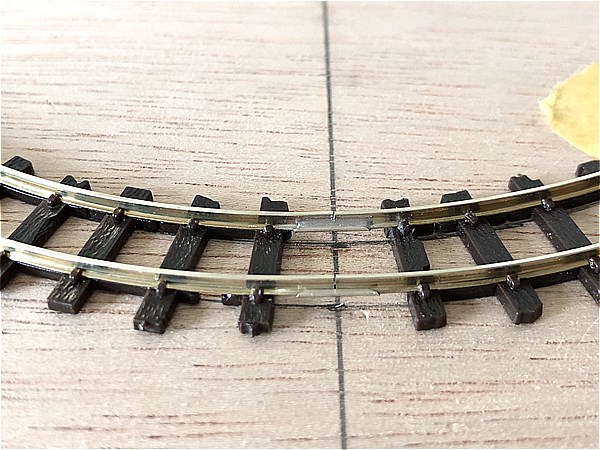
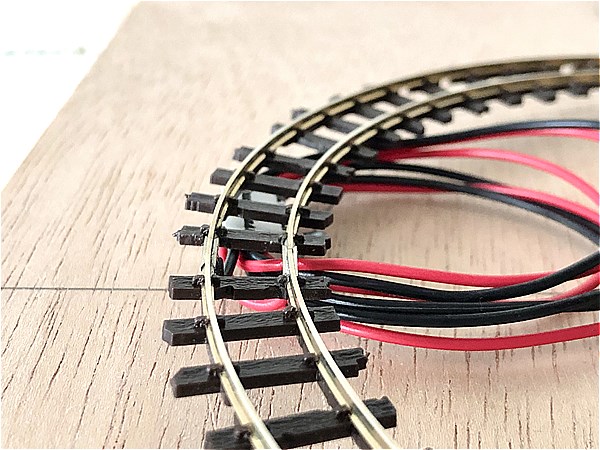
5.Joining the tracks
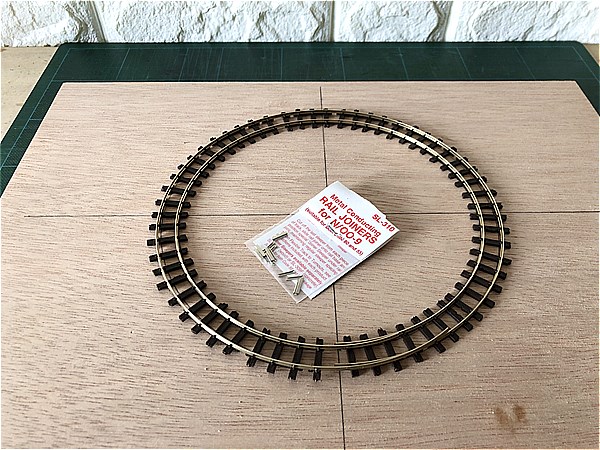
Use PECO SL-310 to join the tracks.
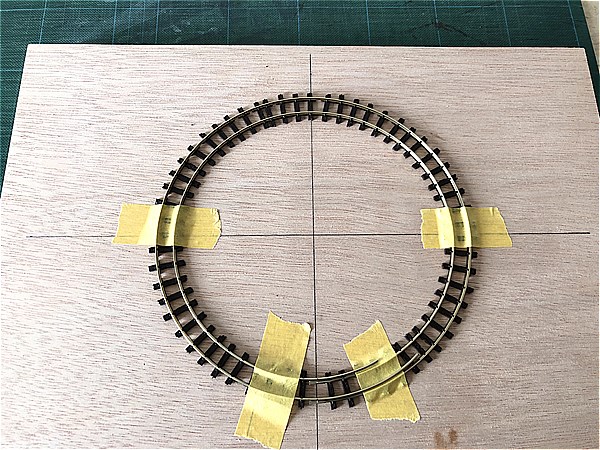
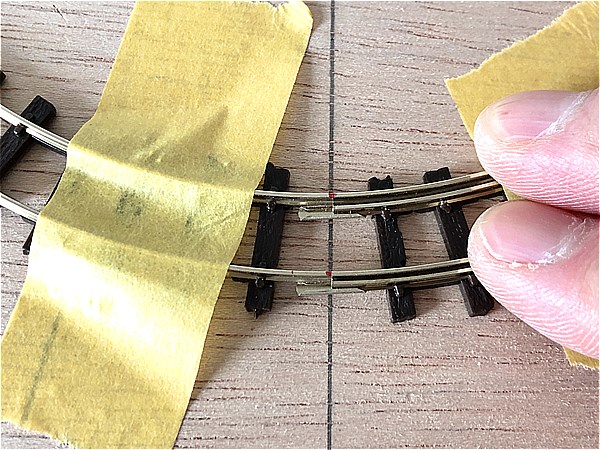
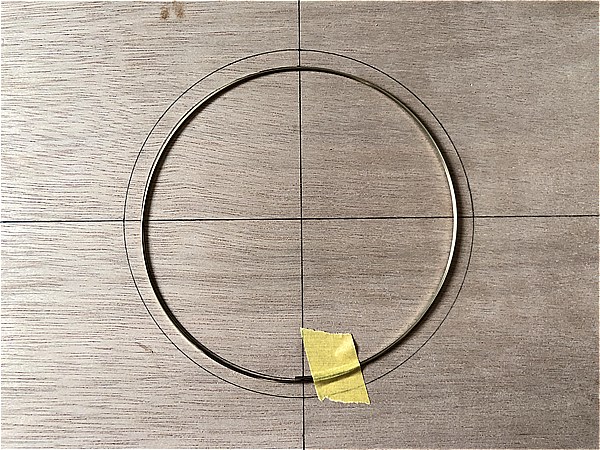
Fix the track to the drafting circle with masking tape and mark the joining (cutting) points.
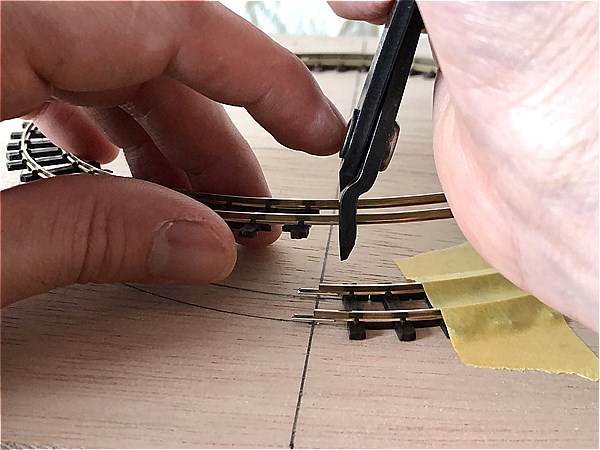
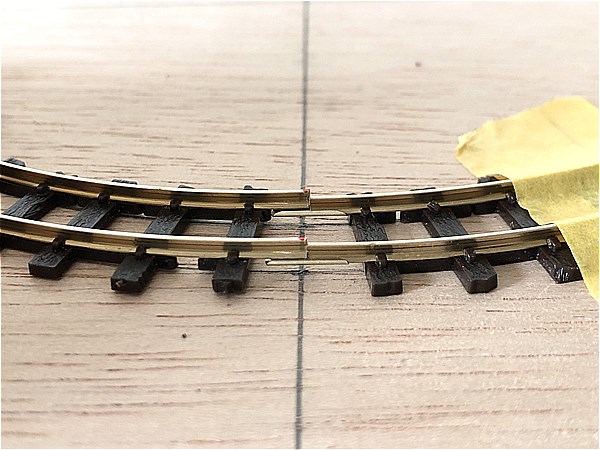
Cut exactly in line with the mark.
It is better to cut at the position where the mark remains with a margin of error.
In such cases as these...
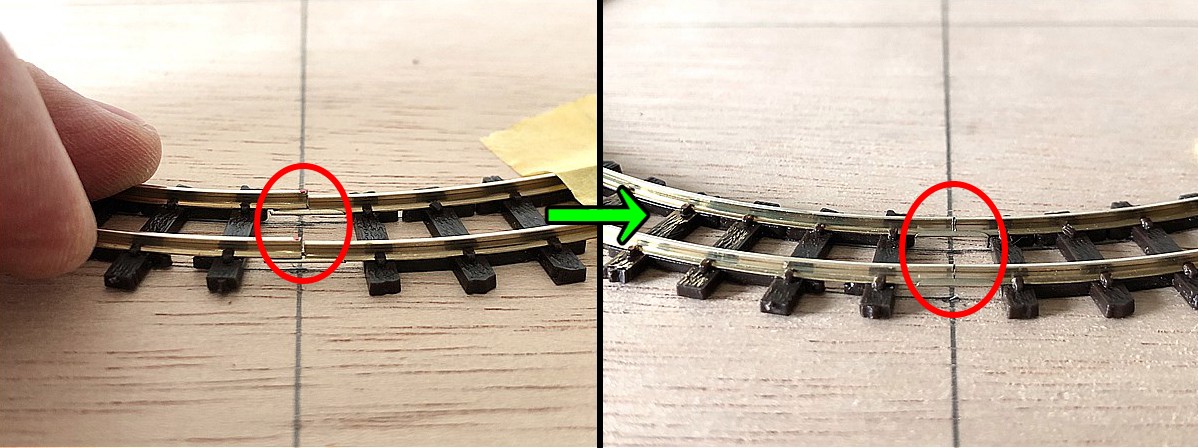
The inner track fits perfectly, but there is a gap in the outer track...
This happens all the time, so relax!
If this happens, just file down the inner track by the width of the gap in the outer track and you're good to go.
The track joints are now complete.
It fits perfectly with the drafting circle.
Checkpoint
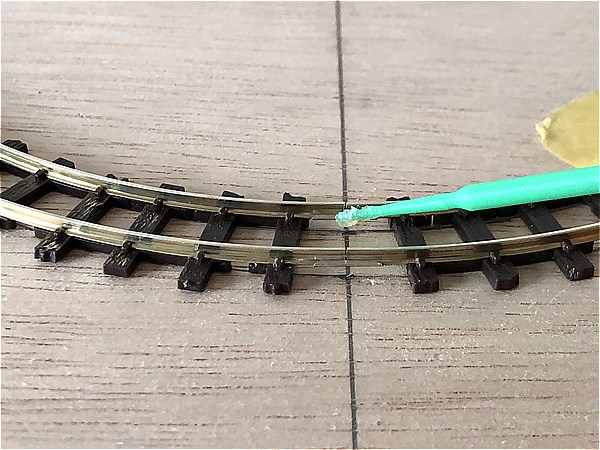
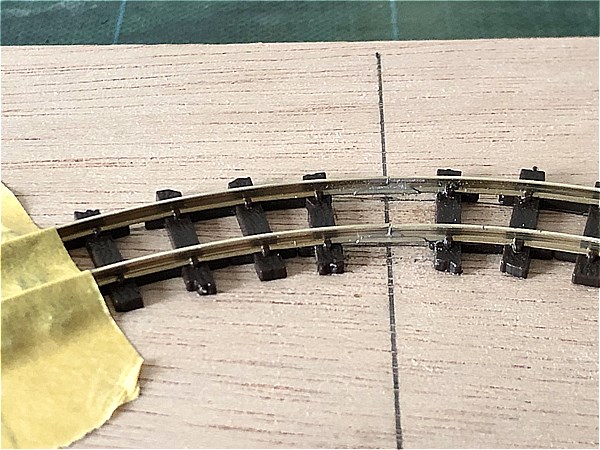
The smaller the curve radius, the easier it is for the joint part to come off due to the resilience of the track.
Therefore, a thin layer of solder is applied to the inside of the track to increase the strength of the joint.
6.Install feeder wires
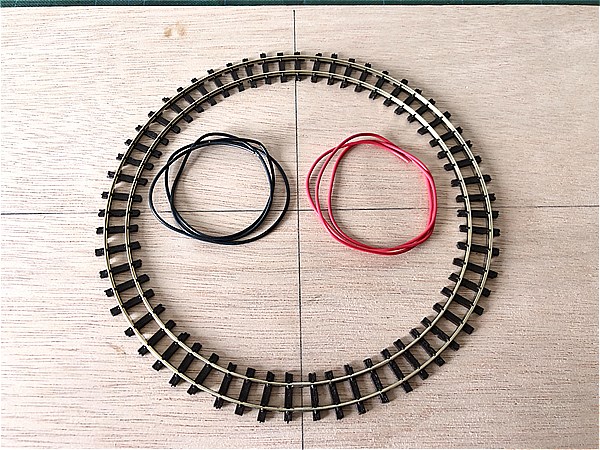
Finally, solder the feeder wires.
We have been using the method recommended by PECO, bending the feeder wires into an L-shape and installing them on the back side of the joiners.
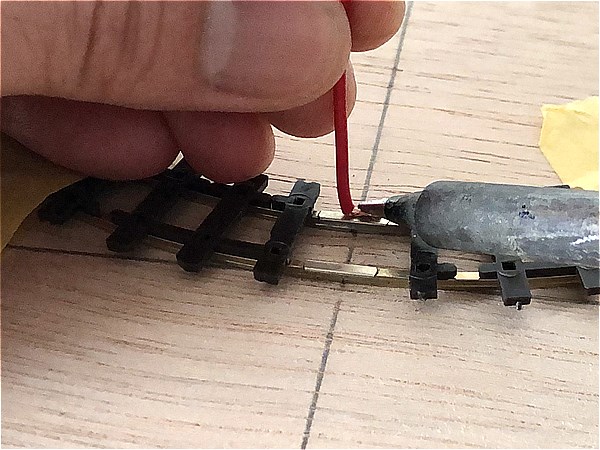
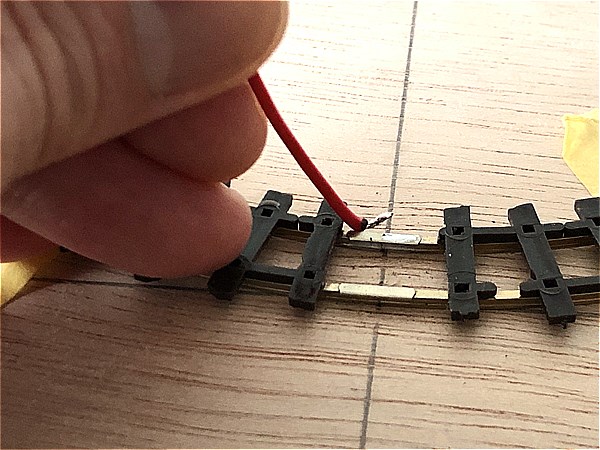
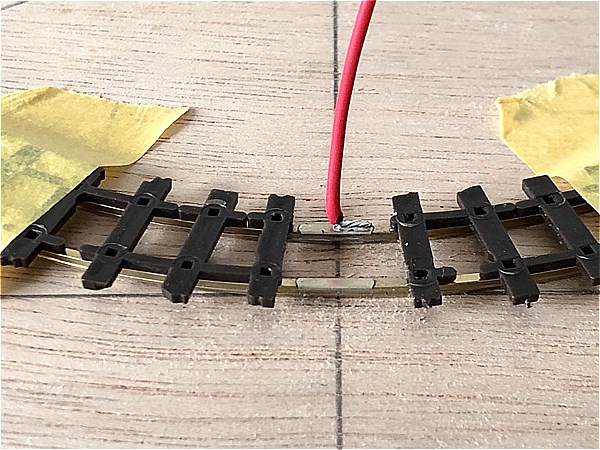
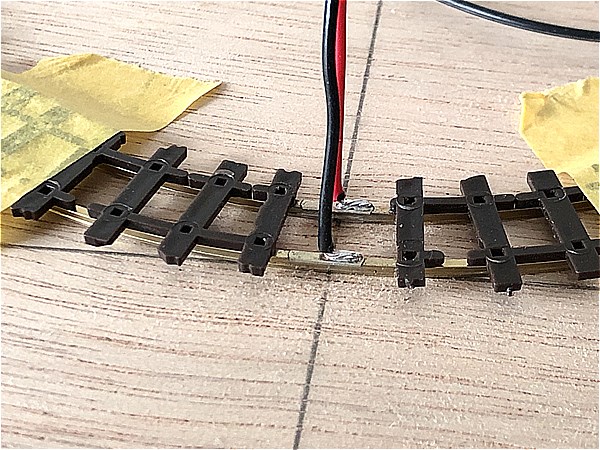
Pre-soldering each feeder wires and joiners makes the solder flow more easily and increases its strength.
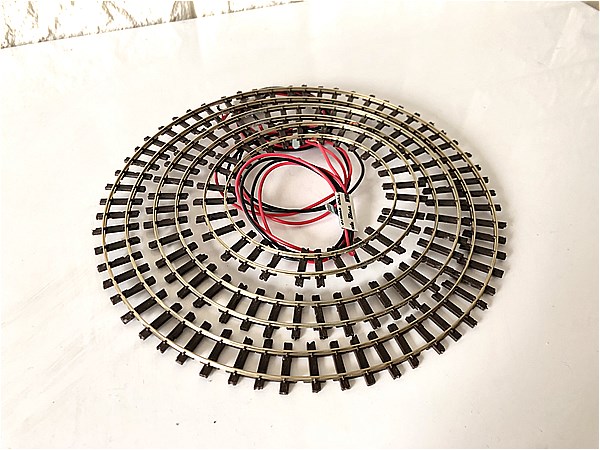
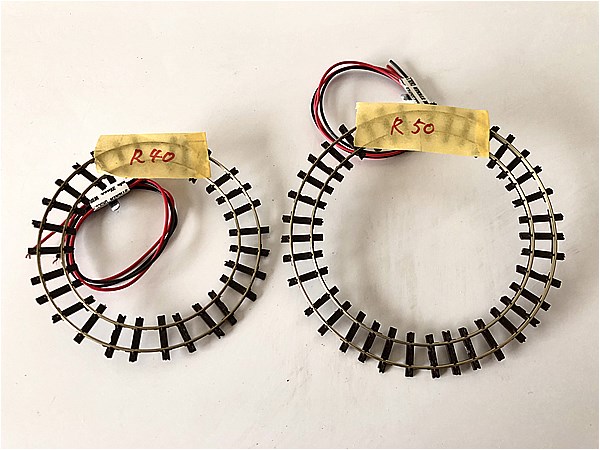
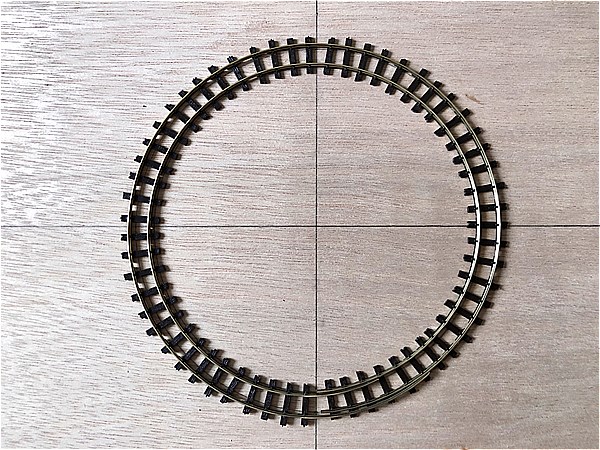
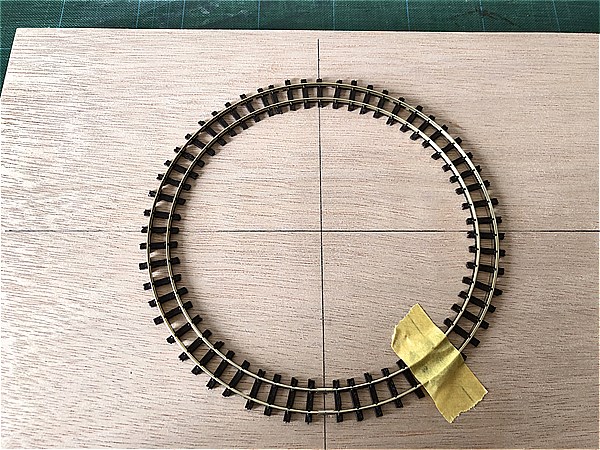
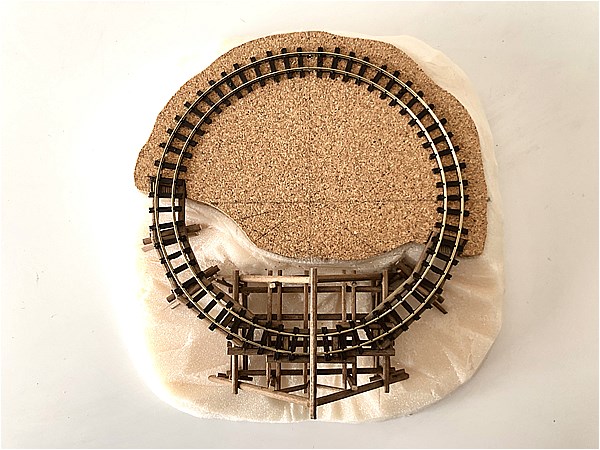
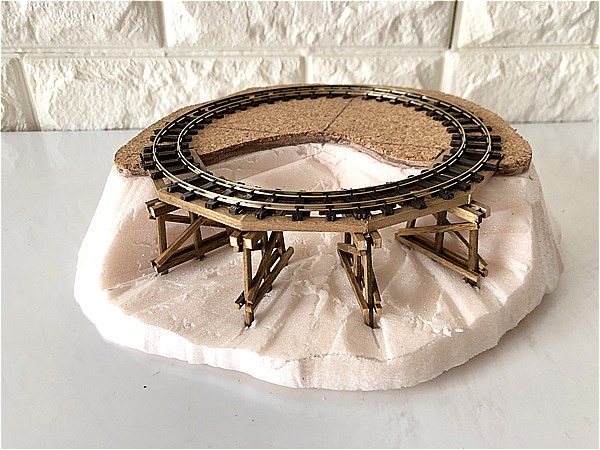
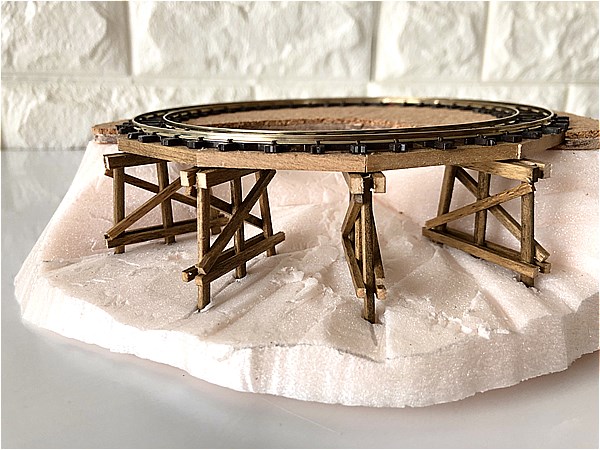
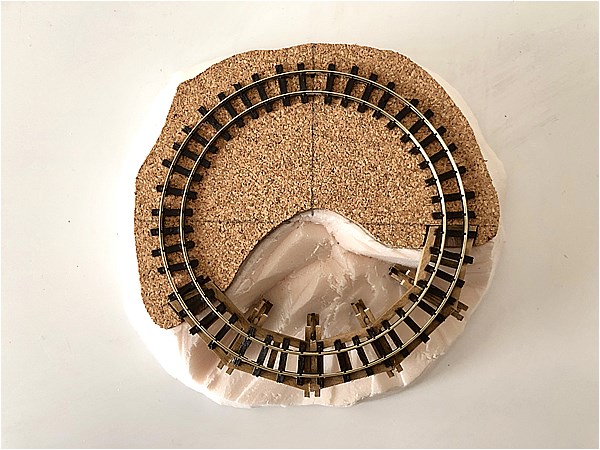
HOe micro radius circular track completed
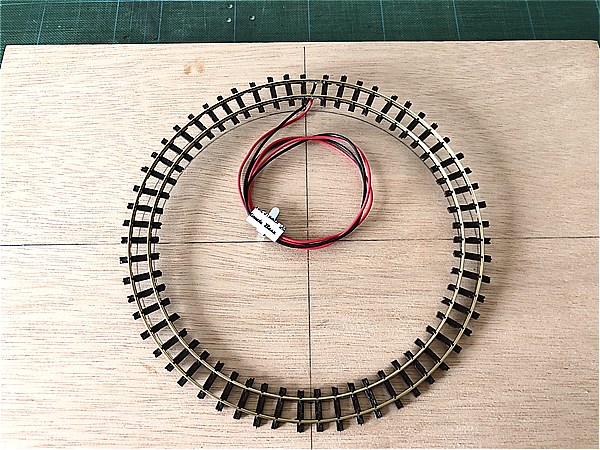

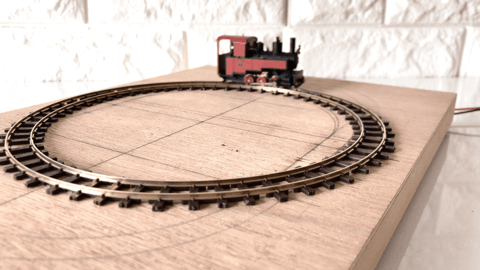
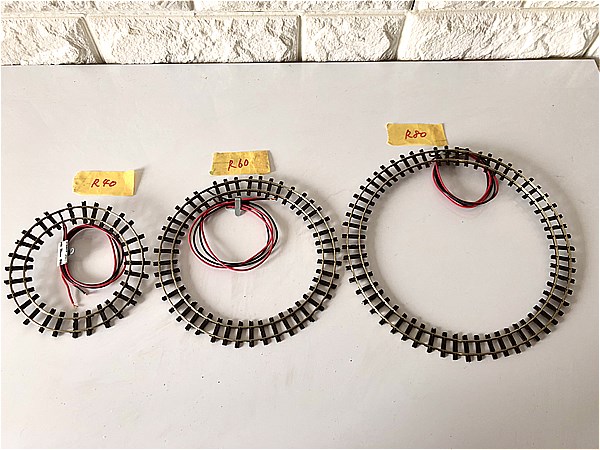
The HOe micro radius circular track with a radius of 80 mm is ready to be enjoyed anywhere you like.
We sell HOe microcircle track with radii of 40, 50, 60 and 80 mm.
Micro layout base with HOe circular track (R80mm)
Micro layout base with HOe circular track (R60mm)
Contact us
We ship internationally and accept payment via PayPal.
Please feel free to contact us to discuss your purchase or enquire about a production order.
Narrow Gauge Shop
Satoru Mimura
1-15-27,Negishi,Machida,
Tokyo,JAPAN 194-0038
E-mail narrow_gauge_shop@ae.auone-net.jp
https://www.youtube.com/c/narrowgaugeshop
https://www.pinterest.jp/narrowgaugeshop/
We're very active on YouTube and Pinterest, so we'd love it if you'd subscribe to our channel (follow us) and hit the good button.
-
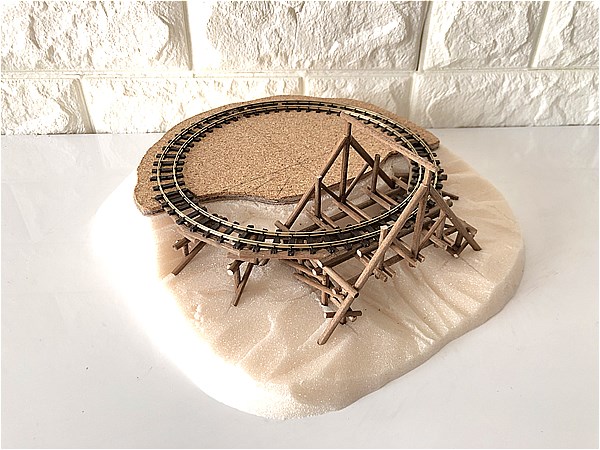
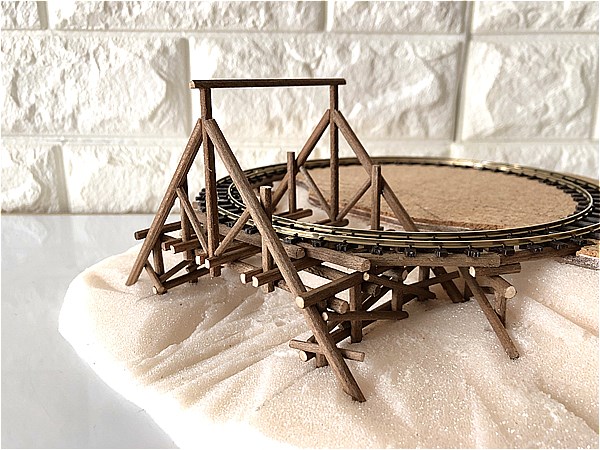
How to make HOe Micro Layout Baseboard with Self-made Turnout by Narrow Gauge Shop